Inserting Tab Stock
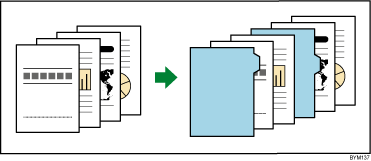
You can insert tab stock at chapter breaks. You can also print on tab stock.
Tab stock can be inserted at chapter breaks set using the “Create Chapter” function on the [Edit Page Order/Layout] screen. You can insert tab stock for each chapter, or you can specify for which chapters tab stock is inserted.

![]()
Before inserting tab stock, you must register a tab stock preset.
Tab stock can be inserted only if the page orientation is set to vertical and the tab is on the right edge of the page.
Tab stock can only be inserted if the [Imposition type] is set to [Normal], [Open orientation] is set to [Open to left], and the page orientation of the first chapter is set to [Portrait] on the [Imposition/Paper Type Settings] screen.
When tab stock is inserted, only the following combinations of mixed-size paper are supported. If you require other combinations, tab stock cannot be inserted.
A3 (297 × 420 mm) and A4 (210 × 297 mm)
B4 (257 × 364 mm) and B5 (182 × 257 mm)
11 × 17 inch and Letter (8.5 × 11)
8K (267 × 390 mm) and 16K (195 × 267 mm)
If your printer does have a function for outputting remaining tab stock, remove any unneeded tab stock from the printer’s trays before beginning output.
To set and insert tab stock
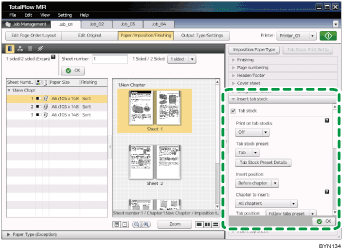
![]() On the [Paper/Imposition/Finishing] screen, click [Insert tab stock] to open the settings pane.
On the [Paper/Imposition/Finishing] screen, click [Insert tab stock] to open the settings pane.

![]() Select the [Tab stock] check box, specify each setting, and then click [OK].
Select the [Tab stock] check box, specify each setting, and then click [OK].
For details about a specific setting, click the ![]() button to display the on-screen balloon help.
button to display the on-screen balloon help.
To print on tabs, click [Tab Stock Print Settg], specify the chapter to print and the text or image to print on the tab.
![]()
For details about registering tab stock presets, see Registering Tab Stock Presets
 .
.For details about printing on tab stock, see Setting Text and Images to Print on Tabs
 .
.For details about setting chapters, see Editing Chapters
 .
.

