Step 9: Specify settings for adding tab stock
In this step, you will specify settings to insert tab stock.
In the following cases, skip this step and proceed to Step 10.
You do not have any tab stock
You are using Booklet [B]
1 |
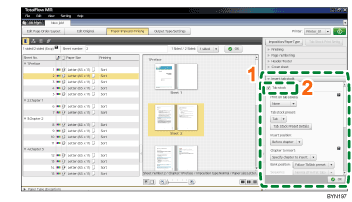
On the [Paper/Imposition/Finishing] screen, click [Insert tab stock] to open the settings pane. |
|
2 |
Select the [Tab stock] check box. |
|
3 |
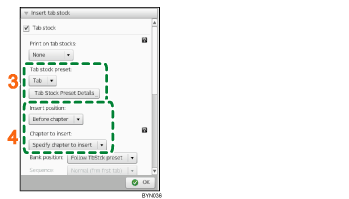
Select [Tab stock preset:] from the drop-down list. If no tab stock presets are available, click [Tab Stock Preset Details], and then register a new tab stock preset for the type of tab stock you have. |
|
4 |
In [Insert position:], select [Before chapter], and in [Chapter to insert:], select [Specify chapter to insert]. |
|
5 |
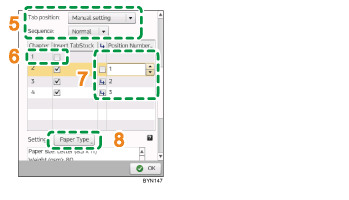
In [Tab position:], select [Manual setting], and in [Sequence:], select [Normal]. |
|
6 |
In the [Insert TabStock] column in the table, clear the check box for "1". |
|
7 |
For chapter "2", clear the |
|
8 |
Click [Paper Type]. |
|
9 |
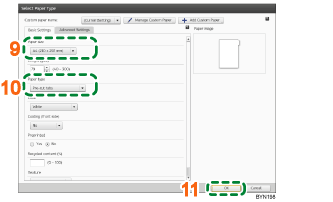
Specify [Paper size] on the [Basic Settings] tab of the [Select Paper Type] screen. Select the tab stock size to use. |
|
10 |
Specify [Paper type]. Select the type of tab stock to use. |
|
11 |
Make other settings as necessary, and then click [OK]. |
|
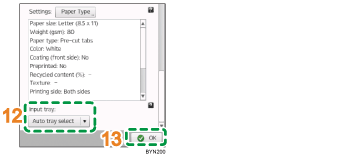
12 |
In [Input tray:], select the tray where the tab stock is loaded. |
|
13 |
Click [OK]. |
![]()
You can also print on the tab stock. For details about printing on tab stock, see Setting Text and Images to Print on Tabs
 .
.
![]()
For more details about [Tab Stock Print Settings], see Inserting Tab Stock
 .
.


