Registering Groups in the Address Book
Register fax destinations and e-mail addresses as a group to send faxes or e-mails to the members registered in the group at one time.

Up to 500 destinations can be registered in a group.
You cannot send data by Send to Folder to a group that includes 50 or more folder destinations.
Creating a Group
 Press [Address Book] on the Home screen.
 Press [Create Group] on the Address Book screen.
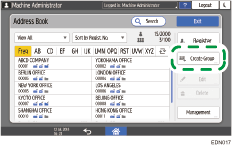
The items displayed on the screen vary depending on the version of RICOH Always Current Technology that is implemented on the machine.
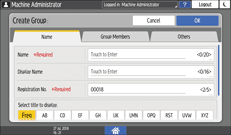
 Enter the information of the group on the [Name] tab, and then select a title to classify it.
 Press [Group Members] tab
  [Add Member].
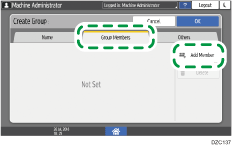
 Select the members to register in a group, and then press [OK].
 Press the [Others] tab, and specify the required settings.
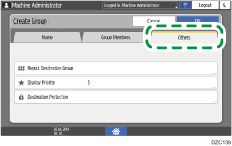
Registration Destination Group: Press to register this group to another group.
Display Priority: When the destinations are sorted in the order of priority, a destination with higher priority is displayed prior to the one with lower priority. The destinations with the same priority are displayed in the order of registration.
Destination Protection: Select this check box to require entering of the protection code to select the group. If a group includes a member to whom the folder destination is specified, the protection can be set on the group.
Using the Protection Function to Prevent the Misuse of Addresses
 Press [OK].
 After completing the procedure, press [Home] (
 ).
).

When you register a new destination, you can specify the group.
Registering the Destination Folder to Use for Send to Folder
Registering a Group to Another Group
You can register another group to the group in addition to destinations. For example, you can register a company as a primary group, and multiple sections as the secondary group.
 Press [Address Book] on the Home screen.
 Select a group to register (secondary group) on the Address Book screen, and then press [Edit].
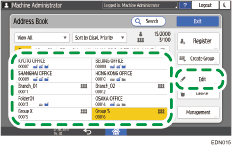
The items displayed on the screen vary depending on the version of RICOH Always Current Technology that is implemented on the machine.
 Press the [Others] tab
  [Registration Destination Group].
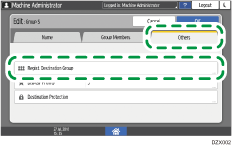
 Press [Select Group].
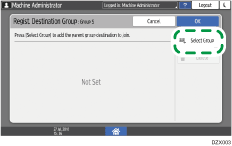
 Select a group (primary group), and then press [OK].
 Press [OK]
 [OK].
[OK].
 After completing the registration, press [Home] (
 ).
).
Changing/Deleting the Data Registered to the Group
 Press [Address Book] on the Home screen.
 Select the group to change or delete on the Address Book screen.
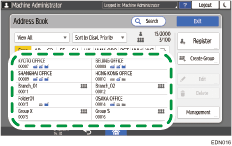
The items displayed on the screen vary depending on the version of RICOH Always Current Technology that is implemented on the machine.
 Press [Edit] or [Delete] to change or delete the group information.
 When changing or deleting is complete, press [Home] (
 ).
).
Confirming Users Registered to the Group
 Press [Address Book] on the Home screen.
 Select the group whose registered users you want to confirm, and then press [Edit].

The items displayed on the screen vary depending on the version of RICOH Always Current Technology that is implemented on the machine.
 Press the [Group Members] tab.
The registered members are displayed.
 When confirming is complete, press [Cancel]
 [Home] (
 ).
).
