Combine
Use this function to combine two originals onto one sheet of paper.
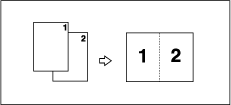
When the two originals are combined, their sizes are reduced or enlarged as follows:
![]() (mainly Europe and Asia)
(mainly Europe and Asia)
Original |
A4 |
B5 |
A5 |
B6 |
|---|---|---|---|---|
Paper |
||||
A3 |
100% |
115% |
141% |
163% |
B4 |
87% |
100% |
122% |
141% |
A4 |
71% |
82% |
100% |
115% |
B5 |
61% |
71% |
87% |
100% |
A5 |
50% |
58% |
71% |
82% |
B6 |
-- |
50% |
61% |
71% |
![]() (mainly North America)
(mainly North America)
Original |
81/2 × 11 |
51/2 × 81/2 |
|---|---|---|
Paper |
||
11× 17 |
100% |
129% |
81/2 ×14 |
77% |
100% |
81/2 × 11 |
65% |
100% |
51/2 × 81/2 |
50% |
65% |
![]() Press the [Combine/Repeat] key.
Press the [Combine/Repeat] key.
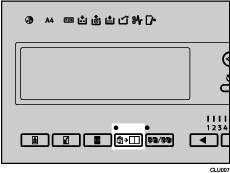
![]() Use the [
Use the [![]() ] [
] [![]() ] keys to select [Combine 2], and then press the [OK] key.
] keys to select [Combine 2], and then press the [OK] key.

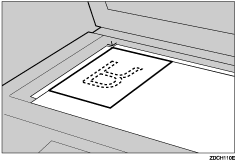
![]() Place the first original face down on the exposure glass.
Place the first original face down on the exposure glass.
![]() Make sure the [Master Making] mode select key is lit.
Make sure the [Master Making] mode select key is lit.
If it is not lit, press the [Master Making] mode select key.
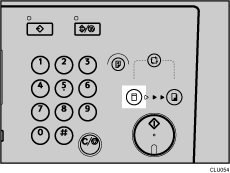
![]() Press the [Start] key.
Press the [Start] key.
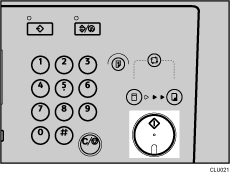
![]() When the scanning of the first original is complete, place the second original face down on the exposure glass.
When the scanning of the first original is complete, place the second original face down on the exposure glass.
![]() Press the [Start] key.
Press the [Start] key.

Printing starts automatically after the trial print.
![]()
If the length of the first original is shorter than 91 mm (3.6 inches), Combine mode will be disabled.
You can set the machine to automatically cancel Combine mode or Repeat mode once you have finished. For details, see 4 Mode Setting
 .
.Any image that is closer than 5 mm (0.2 inches) to the leading edge of the first original will not be printed. Also, any image is closer than 4 mm (0.16 inches) to the leading edge of the second original will not be printed. If an image is too close to the leading edge, make duplicates of the originals with the image shifted away from the leading edge, and then print from the duplicates.
You can select different image settings for the first and second originals.
Make sure the paper feed side plates touch the paper lightly. Otherwise, the two images will not be properly aligned on the prints.
If you want to check the image before printing, press the [Auto Cycle] key before pressing the [Start] key, in order to disable Auto Cycle mode. See When Auto Cycle Mode Is Off
 .
.

