Applying image overlays
This section explains how to place frequently used objects by applying an image overlay.
This function can be performed using the on-screen items indicated in the following illustration.
Note that this explanation outlines general use of the settings area. For details about a specific setting, see the on-screen balloon help that appears when you click the ![]() button.
button.
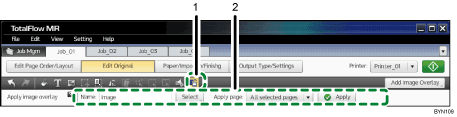
 , the [Apply Image Overlay] button
Click this to apply an image overlay.
Settings area
When you click
, the [Apply Image Overlay] button, the settings for applying an image overlay will appear here.In the thumbnail area, select the page to which you want to apply an image overlay, specify each setting, and then click [Apply].
![]()
If the sizes of the image overlay and the document page are different, the image overlay will be enlarged or reduced to match the size of the document page.
Objects added by image overlay will be placed on top of other objects on the document page.
If you add an object to a document page after applying an image overlay, that object will be placed over any image overlay objects.