


  |  | ||
Follow the procedure below to remove paper jammed in the bypass tray.
You can feed the jammed paper to output ramp by opening the left cover and turning the paper feed wheel.
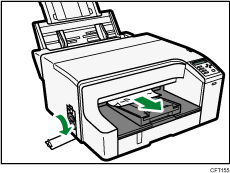
If turning the paper wheel does not remove the jammed paper, use the following procedure to remove it:
Remove any paper in the bypass tray.
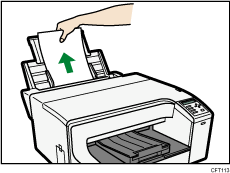
Remove jammed paper.
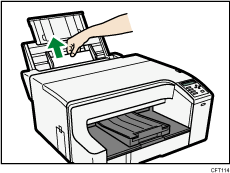
Load paper in the bypass tray with the side to be printed on facing up.
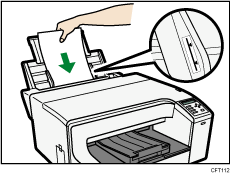
If it is difficult to remove jammed paper, follow the procedure below to remove it.
Multi Bypass Tray BY1000
Press and hold down the [Power] key on the printer until it turns off, and then unplug the power cord.
Disconnect the USB cable or Ethernet cable.
Remove any paper in the bypass tray.
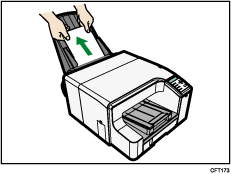
If the Bypass tray extension is pulled out, push it back in.
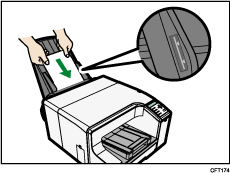
Detach the bypass tray.
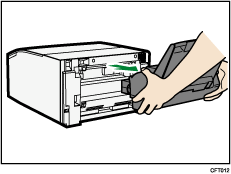
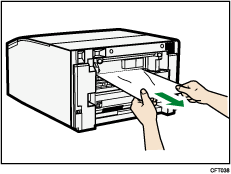
Remove the jammed paper from the rear of the printer.
Reattach the bypass tray.
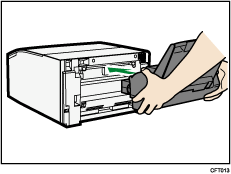
Pull the bypass tray extension out.
Load paper in the bypass tray with the side to be printed on facing up.
![]()
If you cannot remove the jammed paper using the above procedure, clear the jam from the multi bypass tray.
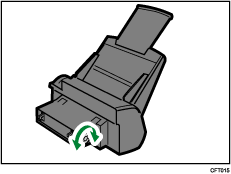
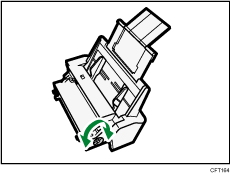
Turn the knob on the bypass tray clockwise to eject the jammed paper.
Turn the dial clockwise and remove paper. If you cannot unload paper, turn the dial anti-clockwise one time, and then turn the dial clockwise.
Multi Bypass Tray BY1020
Press and hold down the [Power] key on the printer until it turns off, and then unplug the power cord.
Disconnect the USB cable or Ethernet cable.
Remove any paper in the bypass tray.

If the Bypass tray extension is pulled out, push it back in.
To release the lock, push the lever for multi bypass tray attachment and detachment so the unlock icon is hidden.
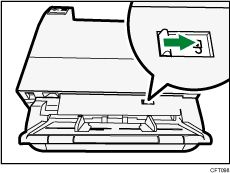
Detach the multi bypass tray.
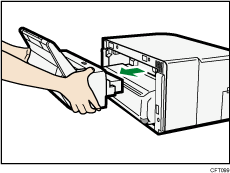
Remove the jammed paper from the rear of the printer.
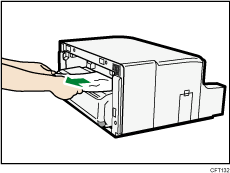
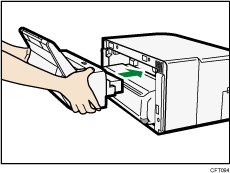
Attach the multi bypass tray until the lever for multi bypass tray attachment and detachment clicks.
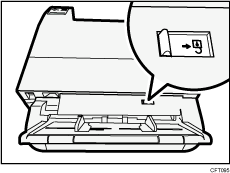
Check that the unlock icon is displayed on the lever for multi bypass tray attachment and detachment.
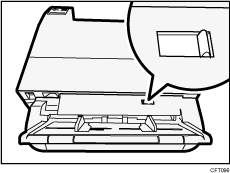
If the unlock icon is not displayed on the lever for multi bypass tray attachment and detachment or the lever is positioned halfway, the multi bypass tray is not attached properly. Attach it again.
Pull the bypass tray extension out.
Load paper in the bypass tray with the side to be printed on facing up.

![]()
If you cannot remove the jammed paper using the above procedure, clear the jam from the multi bypass tray.
Turn the dial clockwise and remove paper. If you cannot unload paper, turn the dial anti-clockwise one time, and then turn the dial clockwise.
The error message will remain displayed until you remove the jammed paper. Check the places where paper jams are likely to occur and remove the jammed paper.
To remove paper from Tray 1, see "Removing Paper Jammed on Tray 1".
To remove paper from Tray 2, see "Removing Paper Jammed on Tray 2".
To remove paper from the top cover, see "Removing Paper Jammed under the Top Cover".
To remove paper from the guide board, see "Removing Paper Jammed around the Guide Board".
To remove paper from the duplex unit, see "Removing Paper Jammed in the Duplex Unit".
If you cannot remove jammed paper completely, see "If You Cannot Remove Jammed Paper".
If paper jams occur repeatedly, see "Paper Is Not Fed or Delivered Normally".