
| |||
The following example explains loading procedure for the standard tray (Tray 1). The same procedure can be used for the optional paper feed unit.
The same procedure can be used for all trays. Tray 1 is used as an example.
![]()
Make sure paper is not stacked higher than the upper limit mark inside the paper tray. Paper misfeeds might occur.
Do not mix different types of paper in the same paper tray.
During printing, do not open or close the printer covers or bypass tray, or pull out or push in the paper tray.
The default of tray 1 is as follows:
![]() A4
A4![]()
![]() 81/2 " × 11 " (Letter)
81/2 " × 11 " (Letter) ![]()
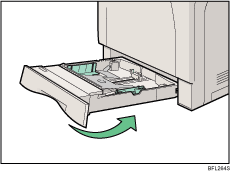
Slowly slide out the paper tray (Tray 1), until it stops. Then, lift the front of the tray slightly, and then pull the tray completely out.
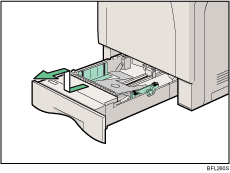
Place the tray on a flat surface.
Pinch the green clips on the side guide and the end guide, and then adjust the guides to the paper size being loaded.
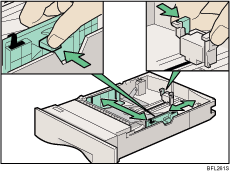
Slide the green switch on the front of the tray to the type of paper to be loaded. When loading paper of 75 g/m2, 20 lb., or thicker, slide the switch to the right.

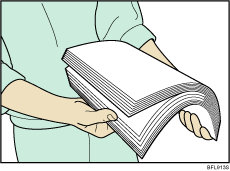
Fan the paper before loafing paper in the tray.
Load the new paper stack print side up, making sure the paper is flush against the paper guides. Adjust the paper guides to close any gaps.
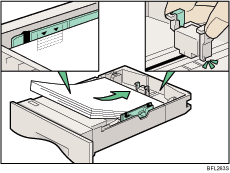
Lift the front of the paper tray (Tray 1), and slowly slide the paper tray back in, until it stops. Make sure the tray is fully inserted to prevent a paper misfeed.
![]()
For details about paper types supported by the printer, see "Types of Paper and Other Media".
| Copyright (C) 2007 |