

  |  | ||
This section describes how to load custom size paper into trays 1 to 4.
![]()
When printing on custom size paper, specify the paper size using the control panel or printer driver.
The custom size paper selected using the printer driver overrides that selected using the control panel. Do not make settings using the control panel if you have already made settings using the printer driver. However, when printing with a printer driver other than the RPCS printer driver, you must configure the settings using control panel.
The following is the range of paper sizes that can be loaded in each type of the paper trays:
Tray 1: 100 - 216 mm (3.94 - 8.5 in.) in width and 148 - 355.6 mm (5.83 - 14 in.) in length.
Optional paper feed unit (Tray 2, Tray 3): 100 - 216 mm (3.94 - 8.5 in.) in width and 210 - 355.6 mm (8.27 - 14 in.) in length.
The printer cannot print from applications that do not support custom size paper.
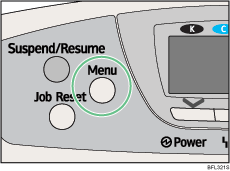
Press the [Menu] key.

Press the [![]() ] or [
] or [![]() ] key to select [Paper Input], and then press the [OK] key.
] key to select [Paper Input], and then press the [OK] key.

Press the [![]() ] or [
] or [![]() ] key to select [Paper Size: (tray name)], and then press the [OK] key.
] key to select [Paper Size: (tray name)], and then press the [OK] key.
For example, [Paper Size: Tray 1] is selected for Tray 1 as shown.

Press the [![]() ] or [
] or [![]() ] key to select [Custom Size], and then press the [OK] key.
] key to select [Custom Size], and then press the [OK] key.

Press the [![]() ] or [
] or [![]() ] key to enter the horizontal value, and then press the [OK] key.
] key to enter the horizontal value, and then press the [OK] key.
![]()

![]()

Press the [![]() ] or [
] or [![]() ] key to enter the vertical value, and then press the [OK] key.
] key to enter the vertical value, and then press the [OK] key.
![]()

![]()

Press the [Menu] key to return to the initial screen.