![]() Open the front covers.
Open the front covers.

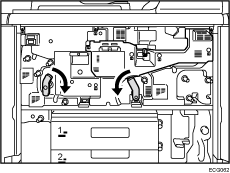
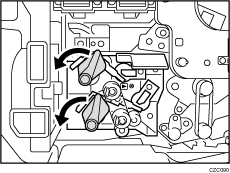
![]() Pull down the 2 levers.
Pull down the 2 levers.
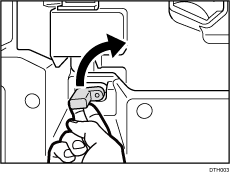
![]() Pull down the lever.
Pull down the lever.
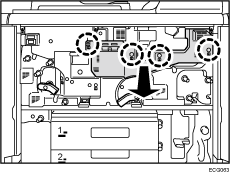
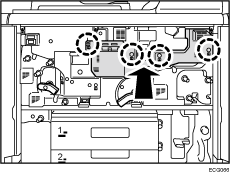
![]() Remove the 4 screws, and then remove the cover.
Remove the 4 screws, and then remove the cover.
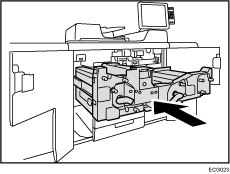
![]() Pull out the drawer until it stops.
Pull out the drawer until it stops.
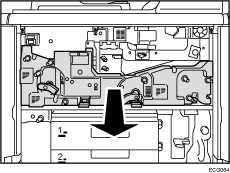
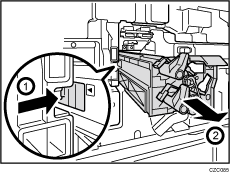
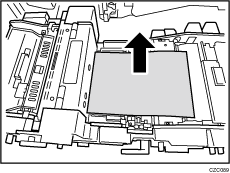
![]() Remove the paper transfer unit.
Remove the paper transfer unit.
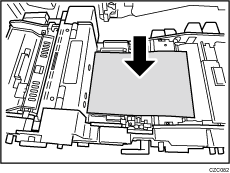
![]() Spread a sheet of paper.
Spread a sheet of paper.
![]() Push the drawer back into the machine.
Push the drawer back into the machine.
![]() Remove the cleaning unit for photoconductor unit.
Remove the cleaning unit for photoconductor unit.
See Replacing the Charger Unit/Cleaning Unit for Photoconductor Unit/Photoconductor Unit.
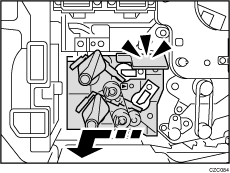
![]() Pull up the 2 levers, and then remove the screw.
Pull up the 2 levers, and then remove the screw.

![]() Holding the grip, pull out the cleaning unit for image transfer belt while pressing it to the left.
Holding the grip, pull out the cleaning unit for image transfer belt while pressing it to the left.
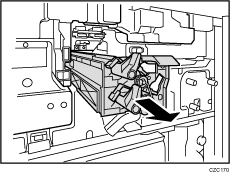
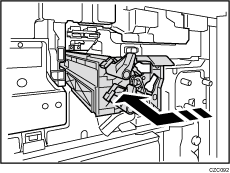
![]() Pull out the cleaning unit for image transfer belt until it stops.
Pull out the cleaning unit for image transfer belt until it stops.
![]() While holding the latch, remove the cleaning unit for image transfer belt.
While holding the latch, remove the cleaning unit for image transfer belt.
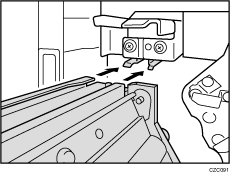
![]() Engage the new cleaning unit for image transfer belt with the guide rail.
Engage the new cleaning unit for image transfer belt with the guide rail.
![]() Push in the cleaning unit for image transfer belt while pressing it to the left.
Push in the cleaning unit for image transfer belt while pressing it to the left.
![]() Secure the cleaning unit for image transfer belt with the screw.
Secure the cleaning unit for image transfer belt with the screw.
![]() Pull out the drawer until it stops.
Pull out the drawer until it stops.
![]() Remove the paper.
Remove the paper.
![]() Push the drawer back into the machine.
Push the drawer back into the machine.
![]() Turn the machine on.
Turn the machine on.
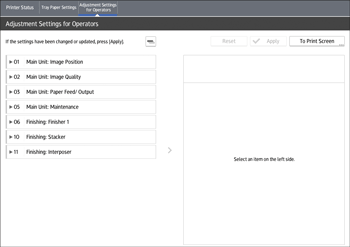
![]() Access the Adjustment Settings for Operators menu.
Access the Adjustment Settings for Operators menu.
See "Accessing Adjustment Settings for Operators", Adjustment Item Menu Guide: TCRU/ORU.
![]() Press [Main Unit: Maintenance].
Press [Main Unit: Maintenance].
![]() Press [Execute ITB Manual Lubrication].
Press [Execute ITB Manual Lubrication].
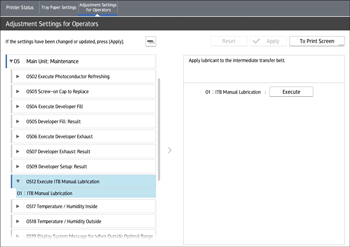
![]() Press [Execute].
Press [Execute].
![]() Close the front covers.
Close the front covers.
Lubrication starts. It takes about 5 minutes.
If lubrication fails soon after starting, check the following:
Is the cleaning unit for image transfer belt attached?
Is the cleaning unit for photoconductor unit detached?
Has the toner run out or almost run out?
If this operation fails halfway, contact your sales or service representative.
![]() Check that lubrication has completed, and then press [Exit].
Check that lubrication has completed, and then press [Exit].
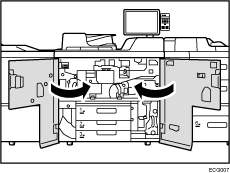
![]() Open the front covers.
Open the front covers.
![]() Attach the paper transfer unit.
Attach the paper transfer unit.
![]() Attach the cleaning unit for photoconductor unit.
Attach the cleaning unit for photoconductor unit.
See Replacing the Charger Unit/Cleaning Unit for Photoconductor Unit/Photoconductor Unit.
![]() Pull down the 2 levers.
Pull down the 2 levers.
![]() Attach the cover, and then secure it with the 4 screws.
Attach the cover, and then secure it with the 4 screws.
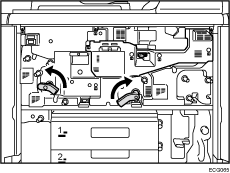
![]() Pull up the 2 levers.
Pull up the 2 levers.
![]() Pull up the lever.
Pull up the lever.
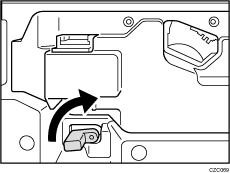
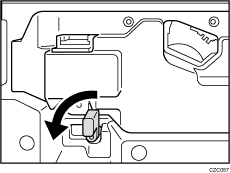
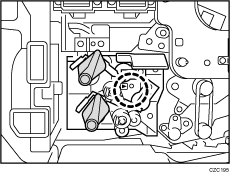
![]()
Push up the lever as shown in the figure. An internal spring will return the lever to its original position. If the lever is held and turned, the roller may not return to the correct position, causing an error.
![]() Close the front covers.
Close the front covers.
![]() Reset the counter for replaceable parts.
Reset the counter for replaceable parts.
Do not turn the machine on until you have read how to do so.