Preset Reduce/Enlarge
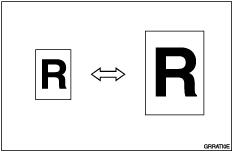
Use this function to reduce or enlarge originals by a preset ratio.
![]() Press [Reduce / Enlarge].
Press [Reduce / Enlarge].
![]() Press [Enlarge] or [Reduce].
Press [Enlarge] or [Reduce].
![]() Select a ratio, and then press [OK].
Select a ratio, and then press [OK].
![]() Press the [Start] key.
Press the [Start] key.
![]()
You can select any ratio regardless of the size of the original or printing paper. However, depending on the ratio you select, parts of the image might not be printed or margins will be printed.
You can choose from nine preset ratios (three enlargement ratios and six reduction ratios).
 (mainly Europe)
Ratio (%)
Original
 Print paper size
200
A5
A3, B6 JIS B4 JIS141
A4
A3, A5 A4122
A4
B4 JIS, A5 B5 JIS115
B4 JIS
A3, B5 JIS A493
-
87
A3
B4 JIS, A4 B5 JIS82
B4 JIS
A4, B5 JIS A571
A3
A4, B4 JIS B5 JIS61
A3
B5 JIS, A4 B6 JIS50
A3
A5, B4 JIS B6 JIS (mainly North America)
Ratio (%)
Original
Print paper size200
51/2 × 81/2
11 × 17155
51/2 × 81/2
8 1/2 × 14129
81/2 × 11
11 × 17121
81/2 × 14
11 × 1793
-
85
F
81/2 × 1177
81/2 × 14
81/2 × 1174
11 × 15
81/2 × 1165
11 × 17
81/2 × 11 50
11 × 17
51/2 × 81/2You can specify the reproduction ratio that is selected by default when the power is turned on. See Master Making / Print Settings
 .
.If you want to check the image before printing, press the [Auto Cycle] key before pressing the [Start] key, in order to disable Auto Cycle mode. See When Auto Cycle Mode Is Off
.