Removing internal/tray 1/tray 2 jam
If “Internal Misfeed”, “Misfeed: Tray 1”, “Misfeed: Tray 2” appears on the display, follow the procedure below to remove it.
![]()
|
![]()
|
![]()
|
![]() Pull tray 1 halfway out, and check for jammed paper. If there is jammed paper, remove it carefully.
Pull tray 1 halfway out, and check for jammed paper. If there is jammed paper, remove it carefully.
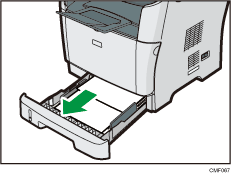
![]() Carefully slide tray 1 back in until it stops.
Carefully slide tray 1 back in until it stops.
![]() If paper is loaded in the bypass tray, remove the paper.
If paper is loaded in the bypass tray, remove the paper.
![]() Close the bypass tray.
Close the bypass tray.
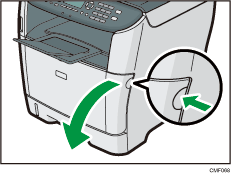
![]() Push the side button to open the front cover, and then carefully lower it.
Push the side button to open the front cover, and then carefully lower it.
![]() Carefully pull out the print cartridge horizontally, holding its center.
Carefully pull out the print cartridge horizontally, holding its center.
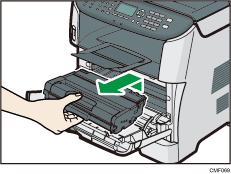
Do not shake the removed print cartridge. Doing so can cause remaining toner to leak.
Place the print cartridge on paper or similar material to avoid dirtying your workspace.
![]() Lifting the guide plate, remove the jammed paper carefully.
Lifting the guide plate, remove the jammed paper carefully.
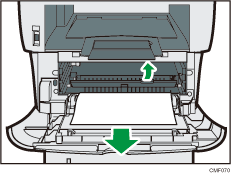
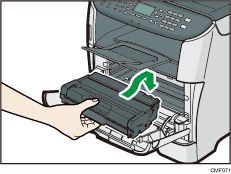
![]() Slide the print cartridge in horizontally. When the cartridge can go no further, raise it slightly and push it fully in. Then push down on the cartridge until it clicks into place.
Slide the print cartridge in horizontally. When the cartridge can go no further, raise it slightly and push it fully in. Then push down on the cartridge until it clicks into place.
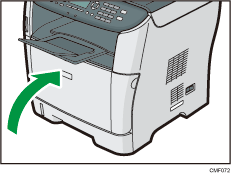
![]() Using both hands, carefully push up the front cover until it closes.
Using both hands, carefully push up the front cover until it closes.
![]()
If paper is jammed in tray 2 but is difficult to locate, pull out tray 2 to remove it. After removing the paper, carefully push tray 2 all the way back inside the machine.
When closing the front cover, push the upper area of the cover firmly. After closing the cover, check that the error is cleared.

