Copying from the Bypass Tray
The bypass tray allows you to copy onto non-standard paper.
Use the bypass tray to copy onto OHP transparencies, adhesive labels, translucent paper, and paper that cannot be loaded in the paper trays.
![]()
Paper that has a vertical length of 90.0
 305.0 mm (3.55
  12.00 inches) and a horizontal length of 148.0
  600.0 mm (5.83
  23.62 inches) can be fed in from the bypass tray.
Paper that has a horizontal length of 433 mm (17 inches) or more is prone to creasing, feed failures, and jamming.
The machine can automatically detect the following sizes as regular size copy paper:
 (mainly Europe and Asia)
A3
 , A4
, A4
 , A5
, A5
 , B4 JIS
 , B5 JIS
 , B6 JIS
 (mainly North America)
11 × 17
 , 81/2 × 11
 , 51/2 × 81/2
When copying onto custom size paper, paper will be delivered automatically to the internal tray.
If the paper you want to copy onto is not shown on the Paper Type screen or its paper weight is between 82
 105 g/m2 (21
  28 lb. Bond), you must specify the paper type under Tray Paper Settings in User Tools. For details about Tray Paper Settings, see “System Settings”, Network and System Settings Reference.
The maximum number of sheets you can load at the same time depends on paper type. Load only as much paper as can be held between the paper guides on the bypass tray.
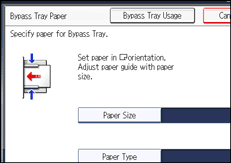
[Bypass Tray Usage]
Press [Bypass Tray Usage] to display a description on using the bypass tray.

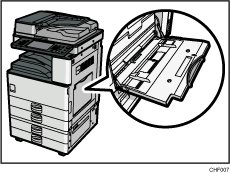
![]() Open the bypass tray.
Open the bypass tray.

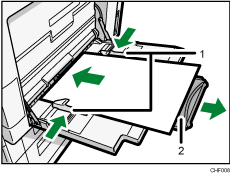
![]() Insert the paper face down until you hear the beep, and then align the paper guides to the paper size.
Insert the paper face down until you hear the beep, and then align the paper guides to the paper size.
If the guides are not flush against the paper, images might be skewed or paper misfeeds might occur.

Paper guides
Extender
![]() Press [Bypass], and then press the [
Press [Bypass], and then press the [![]() ] key.
] key.
![]() Select the size and type of the paper.
Select the size and type of the paper.
![]() Press [OK].
Press [OK].
![]() Place the originals, and then press the [Start] key.
Place the originals, and then press the [Start] key.
![]() When the copy job is finished, press the [Clear Modes] key to clear the settings.
When the copy job is finished, press the [Clear Modes] key to clear the settings.
![]()
Certain types of paper might not be detected properly when placed on the bypass tray. If this happens, remove the paper and place it on the bypass tray again.
Load only as much paper as can be held between the guides on the bypass tray. Overloading the bypass tray can result in misfeeds and skewed images.
The following paper sizes can be selected as the standard sizes:
A3
 , A4
, A4
 , A5
, A5
 , A6
, A6 , B4 JIS
 , B5 JIS
 , B6 JIS
 , 12 × 18
 , 11 × 17
 , 11 × 15
 , 11 × 14
 , 10 × 15
 , 10 × 14
 , 81/2 × 14
 , 81/2 × 13
 , 81/2 × 11
 ,
,81/4 × 14
 , 81/4 × 13
 , 8 × 13
 , 8 × 101/2
 , 8 × 10
 , 71/4 × 101/2
 , 51/2 × 81/2
 , 41/8 × 91/2
 , 37/8 × 71/2
 , C5 Env
 , C6 Env
 , DL Env
 , 8K
, 8K , 16K
, 16K

To support A4
 , 81/2 × 11
 or larger paper sizes, pull out the extender.
To prevent multiple sheets from being fed at once, fan paper before placing it on the tray.
When the Panel Key Sound is turned off, it will not sound if you insert paper into the bypass tray. For details about Panel Key Sound, see “System Settings”, Network and System Settings Reference.
Depending on the environment where the machine is being used, you might at times hear a rustling noise from paper moving through the machine. This noise does not indicate a malfunction.

