Setting the Ethernet Speed
You can set the speed that the printer will use for Ethernet communications. In most cases, this should be left on the default setting, [Auto Select]. This setting allows two interfaces to automatically determine the optimum speed when they are connected.
Router/HUB |
Printer |
||||
|---|---|---|---|---|---|
10Mbps Half D. |
10Mbps Full D. |
100Mbps Half D. |
100Mbps Full D. |
Auto Select |
|
10 Mbps half duplex |
|
- |
- |
- |
|
10 Mbps full duplex |
- |
|
- |
- |
- |
100 Mbps half duplex |
- |
- |
|
- |
|
100 Mbps full duplex |
- |
- |
- |
|
- |
auto-negotiation (auto selection) |
|
- |
|
- |
|
![]()
Connection cannot be established if the selected Ethernet speed does not match your network's transmission speed.
The auto-negotiation mechanism allows two interfaces to automatically determine an optimum Ethernet speed as soon as they are connected. We recommend you select [Auto Select].
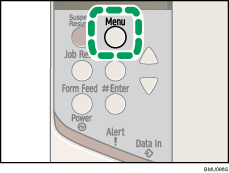
![]() Press the [Menu] key.
Press the [Menu] key.

The [Menu] screen appears.
![]() Press the [
Press the [![]() ] or [
] or [![]() ] key to display [Host Interface], and then press the [
] key to display [Host Interface], and then press the [![]() Enter] key.
Enter] key.

![]() Press the [
Press the [![]() ] or [
] or [![]() ] key to display [Network Setup], and then press the [
] key to display [Network Setup], and then press the [![]() Enter] key.
Enter] key.

![]() Press the [
Press the [![]() ] or [
] or [![]() ] key to display [Ethernet Speed], and then press the [
] key to display [Ethernet Speed], and then press the [![]() Enter] key.
Enter] key.

![]() Press the [
Press the [![]() ] or [
] or [![]() ] key to select the Ethernet speed, and then press the [
] key to select the Ethernet speed, and then press the [![]() Enter] key.
Enter] key.

![]() Press the [Menu] key.
Press the [Menu] key.
The initial screen appears.
![]() Print a configuration page to confirm the settings made.
Print a configuration page to confirm the settings made.
![]()
If Ethernet and wireless LAN are both connected, select which interface you want to use under [LAN Type].
For details about printing the configuration page, see "Printing the Test Page", Quick Installation Guide.
![]()
"Printing the Test Page", Quick Installation Guide.

