Available rollers are Pro 8300S, Pro 8310S, and Pro 8320S.
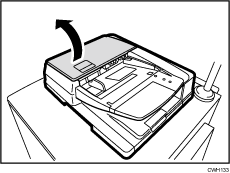
![]() Open the ADF cover.
Open the ADF cover.
![]() Remove the retaining plate.
Remove the retaining plate.
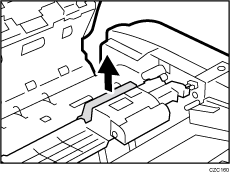
![]() Pull the shaft toward the front of the machine to detach it, and then remove the paper feed unit.
Pull the shaft toward the front of the machine to detach it, and then remove the paper feed unit.
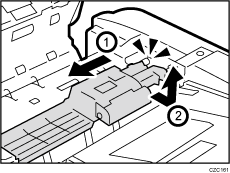
![]() Remove the separation roller cover.
Remove the separation roller cover.
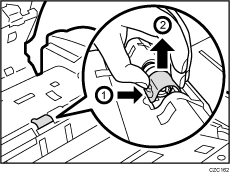
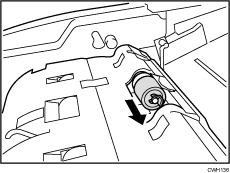
![]() Remove the separation snap ring and roller.
Remove the separation snap ring and roller.
![]() Mount the new separation roller and the snap ring.
Mount the new separation roller and the snap ring.
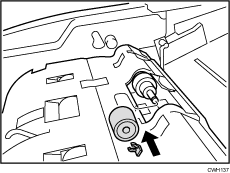
When you replace the parts, be careful not to bend the film.
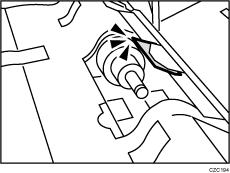
![]() Attach the separation roller cover by aligning the tabs.
Attach the separation roller cover by aligning the tabs.
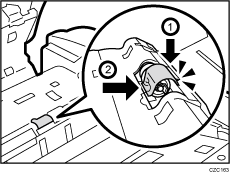
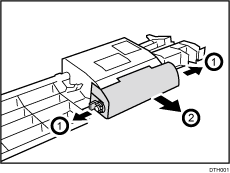
![]() Remove the two pick-up roller’s snap rings and bearings, and then remove the pick-up roller cover.
Remove the two pick-up roller’s snap rings and bearings, and then remove the pick-up roller cover.
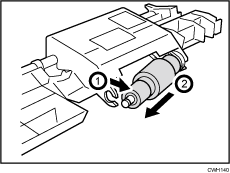
![]() Disengage the shaft, remove the white component, and then remove the pick-up roller.
Disengage the shaft, remove the white component, and then remove the pick-up roller.
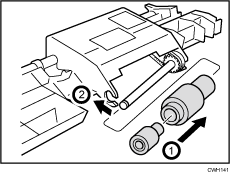
![]() Mount the new pick-up roller and reattach the white component and the shaft.
Mount the new pick-up roller and reattach the white component and the shaft.
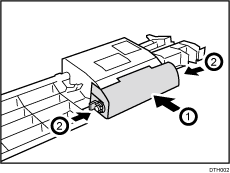
![]() Attach the cover, and then fit the two bearings and snap rings.
Attach the cover, and then fit the two bearings and snap rings.
![]() Pulling the white component away, disengage the projecting part from the pick-up roller.
Pulling the white component away, disengage the projecting part from the pick-up roller.
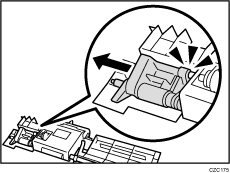
![]() Remove the component containing the pick-up roller.
Remove the component containing the pick-up roller.
Be sure to disengage the projecting part before removing the component. If you try to remove it forcefully, you may damage it.
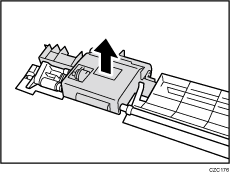
![]() Remove the paper feed belt cover.
Remove the paper feed belt cover.
The paper feed belt cover's spring comes off easily. Be careful not to lose it.
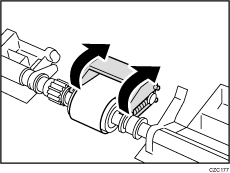
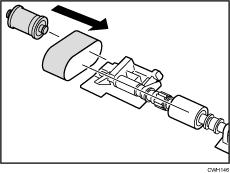
![]() Remove the idler roller and the paper feed belt.
Remove the idler roller and the paper feed belt.
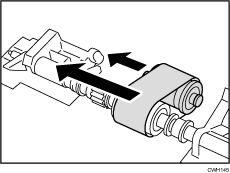
![]() Install the new paper feed belt and reattach the idler roller.
Install the new paper feed belt and reattach the idler roller.
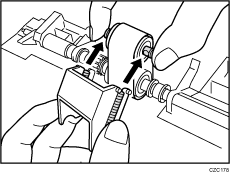
![]() Insert the cover's bars into the holes in the idler roller's shaft.
Insert the cover's bars into the holes in the idler roller's shaft.
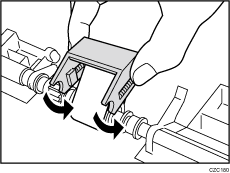
![]() Attach the paper feed belt cover.
Attach the paper feed belt cover.
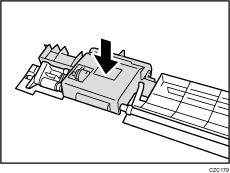
![]() Attach the component containing the pick-up roller.
Attach the component containing the pick-up roller.
![]() Pull the white component and insert the stud into the component containing the pick-up roller.
Pull the white component and insert the stud into the component containing the pick-up roller.

![]() Insert the end of the shaft into the hole.
Insert the end of the shaft into the hole.
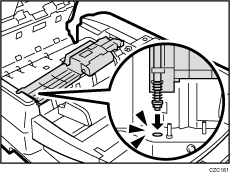
![]() Install the paper feed unit by inserting the end of the shaft into the socket in the white component, making sure that the end of the shaft and the socket have the same cross-sectional shape.
Install the paper feed unit by inserting the end of the shaft into the socket in the white component, making sure that the end of the shaft and the socket have the same cross-sectional shape.
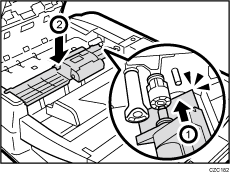
![]() Reattach the stopper.
Reattach the stopper.
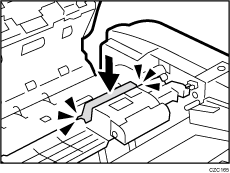
![]() Close the ADF cover.
Close the ADF cover.
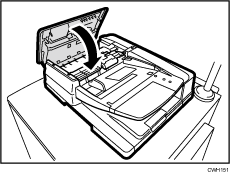
![]() Reset the counter for replaceable parts.
Reset the counter for replaceable parts.
Do not turn the machine on until you have read how to do so.
