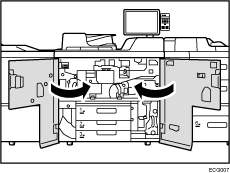
![]() Open the front covers.
Open the front covers.

![]() Remove tray 1.
Remove tray 1.
For details about how to remove tray 1, see steps 2 through 6 on Replacing the Rollers in Tray 1.
If the optional A3 tray unit is attached, see steps 2 through 5 on If A3 Tray Unit Is Attached.
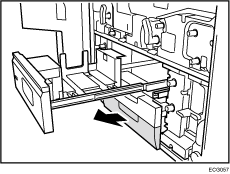
![]() Pull tray 3 out until it stops.
Pull tray 3 out until it stops.
The figures in the following steps assume that tray 1 is pulled out.
![]() Pull tray 2 out until it stops.
Pull tray 2 out until it stops.

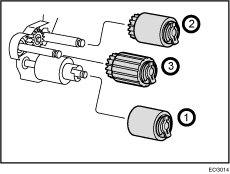
![]() Remove the paper feed roller in the following order:
Remove the paper feed roller in the following order:
(1) Pick-up roller
(2) Feed roller
(3) Separation roller
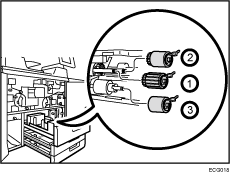
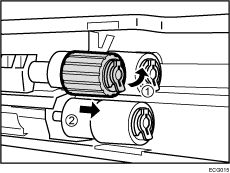
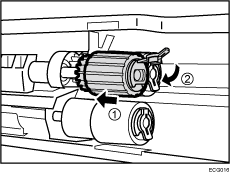
Unlock and remove the paper feed roller.
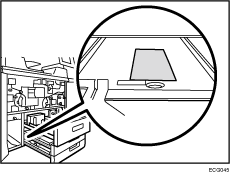
If the optional anti-humidity heater is installed, there is an optional anti-humidity heater near the roller.
The optional anti-humidity heater may be hot, so to avoid burns, be careful not to touch it.
Tray 1 position
Tray 3 position
![]() Attach the new paper feed roller in the following order:
Attach the new paper feed roller in the following order:
(1) Separation roller
(2) Feed roller
(3) Pick-up roller
Replace the paper feed rollers and lock them in place.
![]() Push tray 2 back into the machine.
Push tray 2 back into the machine.

![]() Push tray 3 back into the machine.
Push tray 3 back into the machine.
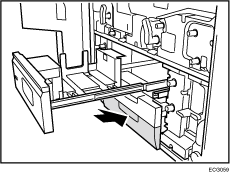
![]() Replace tray 1.
Replace tray 1.
For details about how to replace tray 1, see steps 9 through 12 on Replacing the Rollers in Tray 1.
If the optional A3 tray unit is attached, see steps 8 through 10 on If A3 Tray Unit Is Attached.
![]() Close the front covers.
Close the front covers.
![]() Reset the counter for replaceable parts.
Reset the counter for replaceable parts.
Do not turn the machine on until you have read how to do so.