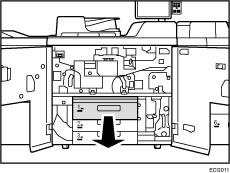
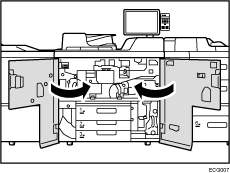
![]() Open the front covers.
Open the front covers.

![]() Pull open the tray until it stops.
Pull open the tray until it stops.
Remove any paper in the tray.
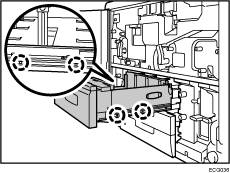
![]() Remove the 4 screws.
Remove the 4 screws.
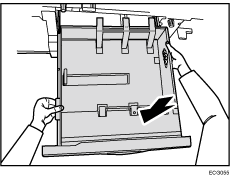
![]() Holding the handle on the left side of the tray, slip your hand into the opening on the right side to support it, and pull it out.
Holding the handle on the left side of the tray, slip your hand into the opening on the right side to support it, and pull it out.
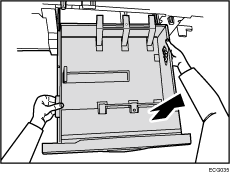
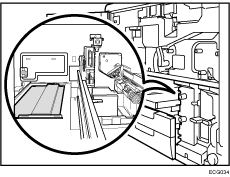
The connectors on the back of the tray have sharp edges. Be careful not to touch them.
![]() Push the guide rails back into the machine.
Push the guide rails back into the machine.
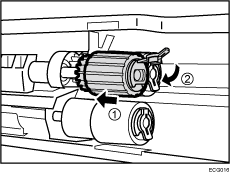
![]() Remove the paper feed roller in the following order:
Remove the paper feed roller in the following order:
(1) Pick-up roller
(2) Feed roller
(3) Separation roller

Unlock and remove the paper feed roller.
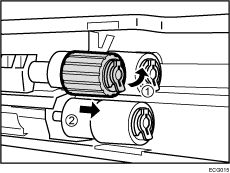
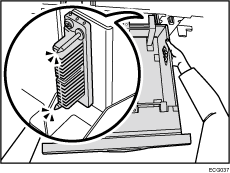
If the optional anti-humidity heater is installed, there is an optional anti-humidity heater near the roller.
The optional anti-humidity heater may be hot, so to avoid burns, be careful not to touch it.
![]() Attach the new paper feed roller in the following order:
Attach the new paper feed roller in the following order:
(1) Separation roller
(2) Feed roller
(3) Pick-up roller
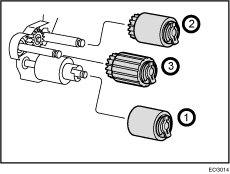
Replace the paper feed rollers and lock them in place.
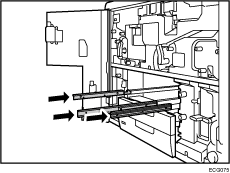
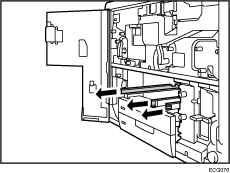
![]() Pull out the guide rails.
Pull out the guide rails.
![]() Replace the inner tray, aligning it with the screw holes in the left and right guide rails.
Replace the inner tray, aligning it with the screw holes in the left and right guide rails.
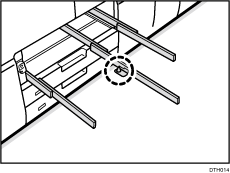
When putting the tray on the guide rails, align the hole in the bottom of the tray with the pin on the center rail.
![]() Secure the tray with the 4 screws.
Secure the tray with the 4 screws.
![]() Push the tray back into the machine.
Push the tray back into the machine.
![]() Close the front covers.
Close the front covers.
![]() Reset the counter for replaceable parts.
Reset the counter for replaceable parts.
Do not turn the machine on until you have read how to do so.