Making Enlarged or Reduced Copies
You can enlarge or reduce the original when copying with the following methods:
Enlarging or reducing at a specified reduction ratio or into a specified size (Zoom/Reduce/Enlarge/Size Magnification)
Enlarging or reducing according to the paper size (Auto Reduce/Enlarge)
Reducing slightly (Create Margin)
Specifying a Copy Ratio or Size
 Press [Copy] on the Home screen.
 Place the original.
Placing an Original on the Scanner
The base point of reduce/enlarge is different for the exposure glass and Auto Document Feeder (ADF) as shown in the following table:
Setting position | Base point | Enlarge | Reduce |
|---|---|---|---|
Exposure glass | Enlarged or reduced from the top left. 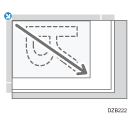 |  |  |
Auto document feeder (ADF) | Enlarged or reduced from the bottom left 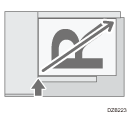 |
When you set a 2-sided original in the One-pass duplex scanning ADF, the top right corner of the original will be the base point for the enlargement/reduction of the reverse side. To enlarge or reduce from the same point, set the original on the exposure glass and perform 2-sided copy.
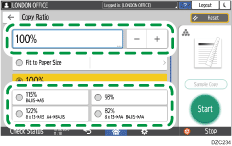
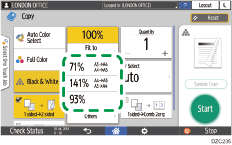
 Press [Copy Ratio] and select a copy ratio or size.

To specify a copy ratio or size other than the displayed setting, press [Others] and perform the following procedure.
Specifying a copy ratio (Zoom/Reduce/Enlarge)
Enter a value or select the copy ratio.
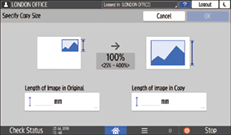
Specifying a size (Size Magnification)
Press [Specify Copy Size] and enter the length of the original and copied image.
 Press [Start].

You can change the options of the copy ratio that is displayed on the Copy screen when pressing [Copy Ratio]. You can also change the enlargement and reduction ratios that appear when [Copy Ratio]
 [Others] is pressed on the Copy screen.
Settings Screen Type: Standard
Settings Screen Type: Classic
Enlarging or Reducing According to the Paper Size
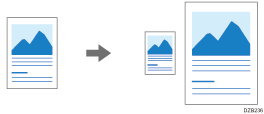
The original is enlarged or reduced to fit on the specified paper size (Scale to Paper Size)
The document sizes that can be detected automatically are shown in the table below. To copy a document whose size is not listed in the table, specify [Original Size] on the Copy screen.
 (mainly Europe and Asia)
Original size | A3 | B4 JIS | A4 | B5 JIS | A5 | B6 JIS | 11 × 17 | 81/2 × 11 | 81/2 × 13 |
|---|---|---|---|---|---|---|---|---|---|
Exposure glass |
|
|
|
|
| - | - | - | - |
ADF |
|
|
|
|
|
|
|
|
|
*1 Portrait orientation (![]() ) only
) only
 (mainly North America)
Original size | 11 × 17 | 81/2 × 14 | 81/2 × 132/5 | 81/2 × 11 | 51/2 × 81/2 | 10 × 14 | 71/4 × 101/2 | A3 | A4 |
|---|---|---|---|---|---|---|---|---|---|
Exposure glass |
|
|
|
|
| - | - | - | - |
ADF |
|
|
|
|
|
|
|
|
|
 Press [Copy] on the Home screen.
 Place the original.
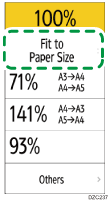
 On the Copy screen, press [Copy Ratio] and [Fit to Paper Size].
 Select the tray loaded with the paper to use.
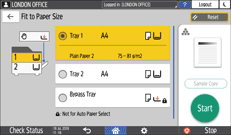
When the orientations of the original and paper in the paper tray do not match, the machine rotates the copied image automatically. To reduce an original of A3 (11 × 17) size to A4 (81/2 × 11) size, for example, you can select either A4 (81/2 × 11)![]() or A4 (81/2 × 11)
or A4 (81/2 × 11)![]() .
.

 Press [Start].
Reducing Slightly to Increase the Margins
The original is reduced to 93% in size and printed in the center of the paper. This setting is useful if you want to copy an original to a paper of the same size without the edges being slightly cropped when copied in full size or to increase the margins.
 Press [Copy] on the Home screen.
 Place the original.
 On the Copy screen, press [Create Margin].

If the key cannot be found, register [Create Margin] in the following item.
Settings Screen Type: Standard
[Customize Function: Copy (Standard Mode)] or [Customize Function: Copy (All View Mode)]
Settings Screen Type: Classic
[Customize Function: Copy (Standard Mode)] or [Customize Function: Copy (All View Mode)]
 Press [Start].

You can change the copy ratio of [Create Margin] to a value other than 93%.
Settings Screen Type: Standard
Settings Screen Type: Classic
