The cleaning tasks varies depending on the release date.
Clean the Contact Glass if the following occurs:
In [Adjustment Settings for Operators], 02: [Machine: Image Quality], after selecting 0201:[Execute Image Quality Adjustment] and performing [Density Difference: Acr Fd], vertical black streaks appear in the affected area and cannot be eliminated by cleaning the line sensor.
Cleaning procedure
Wipe the glass surface with the supplied cleaning cloth.
Do not use alcohol to wipe the glass surface, because it will cause uneven wiping.
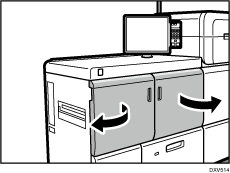
![]() Open the left front cover of the main unit.
Open the left front cover of the main unit.
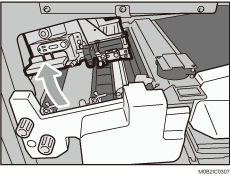
![]() Raise the E3 lever.
Raise the E3 lever.
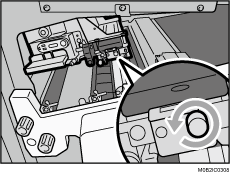
![]() Remove the coin screw.
Remove the coin screw.
If the screw does not come out easily, loosen it with a coin or similar.
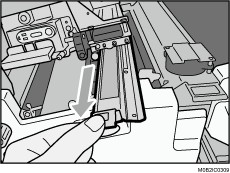
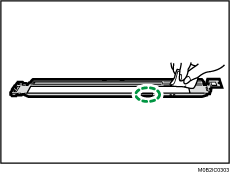
![]() Remove the contact glass by pulling it toward you.
Remove the contact glass by pulling it toward you.
Keep hold of the trailing edge of the contact glass to prevent it from dropping.
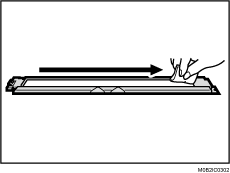
![]() Wipe both sides of the glass in one direction, either from the back to front or from the front to back.
Wipe both sides of the glass in one direction, either from the back to front or from the front to back.
Wipe and make sure no fingerprints, dust or paper dust remain.
To prevent the deformation of the paper guide, place on a flat surface.
Be careful not to deform the black sheet.
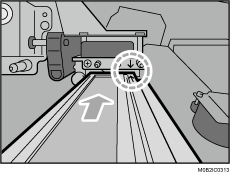
![]() After cleaning the rollers on the revolver, reattach the contact glass and tighten the coin screw. In inserting the contact glass, align the arrows.
After cleaning the rollers on the revolver, reattach the contact glass and tighten the coin screw. In inserting the contact glass, align the arrows.
![]() Close all covers that were opened.
Close all covers that were opened.