To protect it from shock and vibration during transit, this printer comes packaged in cushioning foam and secured with tape. Remove the protective materials after placing the printer in the location where it will be installed.
![]()
|
![]()
|
![]()
The removed tape is sticky. Be careful not to let the sticky side touch your skin or clothes.
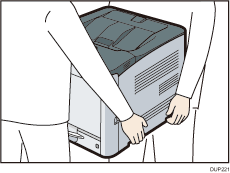
Do not grip the tray area when lifting the printer.
Make sure that paper clips, staples, or other small metallic objects do not fall inside the printer.
![]() Remove the plastic bag.
Remove the plastic bag.
![]() Lift the printer with two people by using the inset grips on both sides of the printer.
Lift the printer with two people by using the inset grips on both sides of the printer.
Lower the printer slowly and carefully to prevent getting your hands stuck.
Be sure two people lift the printer.
When moving the printer, do not hold the following parts. Doing so may cause them to break.
The handle on the standard paper feed tray
The underside of the bypass tray
![]() Remove the tape on the outside of the printer.
Remove the tape on the outside of the printer.
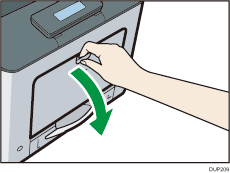
![]() While pressing and holding the bypass tray open lever in the upper center of the bypass tray, pull the tray open.
While pressing and holding the bypass tray open lever in the upper center of the bypass tray, pull the tray open.
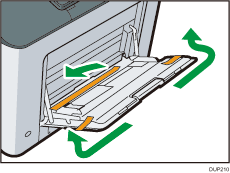
![]() Remove the tape.
Remove the tape.
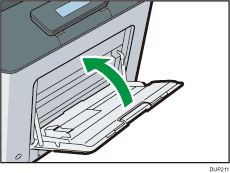
![]() Close the bypass tray.
Close the bypass tray.
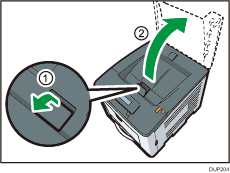
![]() Pull the top cover open lever upward to open the top cover.
Pull the top cover open lever upward to open the top cover.
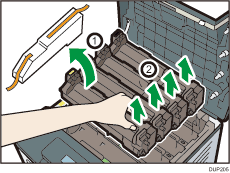
![]() Remove the cushioning material and print cartridges.
Remove the cushioning material and print cartridges.
![]() Remove the tape.
Remove the tape.

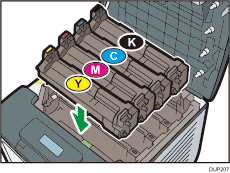
![]() Return the print cartridges to its original position.
Return the print cartridges to its original position.
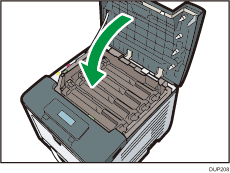
![]() Close the top cover with both hands carefully.
Close the top cover with both hands carefully.
When you have finished unpacking, do the following:
If you want to use the printer with optional accessories installed, see Attaching the Paper Feed Unit.
If you want to use the printer without optional accessories installed, see Loading Paper.
For details about settings up the printer, see Printer Set Up Procedure.