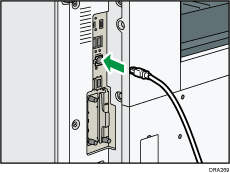
This section describes how to connect a USB2.0 (Type B) interface cable to the USB2.0 port.
![]()
|
![]() Remove the cover of USB2.0 port.
Remove the cover of USB2.0 port.
![]() Connect a USB2.0 (Type B) interface cable to the USB2.0 port.
Connect a USB2.0 (Type B) interface cable to the USB2.0 port.

![]() Connect the other end to the Extended USB Port of the USB Device Server (optional).
Connect the other end to the Extended USB Port of the USB Device Server (optional).
![]()
To print via a USB connection, install the Extended USB board. For details about installing the Extended USB board, see Installing the Wireless LAN interface board.
This machine does not come with a USB interface cable. Make sure you purchase the appropriate cable for the machine (connector shape) and your computer.
Use a five meter (197 inch) or shorter cable which supports USB2.0 (Type B) interface.
The USB2.0 interface board is supported by Windows Vista/7/8.1/10, Windows Server 2008/2008 R2/2012/2012 R2/2016, and OS X 10.8 or later.
When used with OS X 10.8 or later, a transfer speed of USB2.0 is supported.
For details about installing the printer driver, see "Installing the Printer Driver", Driver Installation Guide.
