This section explains how to enable encryption of transmitted data and configure the administrator account. If you want a high level of security, make the following setting before using the printer.
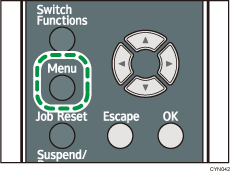
Press the [Menu] key, and then select setting items using the [![]() ] or [
] or [![]() ] key.
] key.
![]() Turn the printer on.
Turn the printer on.
![]() Press the [Menu] key.
Press the [Menu] key.
![]() Select [Host Interface]
Select [Host Interface] ![]() Press [OK]
Press [OK]
![]() Select [Network]
Select [Network] ![]() Press [OK]
Press [OK]
![]() Select [Machine IPv4 Address]
Select [Machine IPv4 Address] ![]() Press [OK]
Press [OK]
![]() Specify IPv4 Address.
Specify IPv4 Address.
For details about how to specify the IPv4 address, see "Ethernet Configuration", Operating Instructions.
![]() Be sure to connect this printer to a network that only administrators can access.
Be sure to connect this printer to a network that only administrators can access.
![]() Start Web Image Monitor, and then log in to the printer as the administrator.
Start Web Image Monitor, and then log in to the printer as the administrator.
For details about logging in to Web Image Monitor as an administrator, see Administrator Login Method.
![]() Point to [Device Management], and then click [Configuration].
Point to [Device Management], and then click [Configuration].
![]() Click [Email] under "Device Settings".
Click [Email] under "Device Settings".
![]() Enter the e-mail address of the administrator of this printer in "Administrator Email Address" and click [OK].
Enter the e-mail address of the administrator of this printer in "Administrator Email Address" and click [OK].
![]() Install the device certificate.
Install the device certificate.
For details about how to install the device certificate, see Protecting Communication Paths via a Device Certificate.
The settings for device certificate creation can be configured only if an administrator e-mail address is specified.
![]() Change the administrator's user name and password.
Change the administrator's user name and password.
For details about specifying administrators' user names and passwords, see Registering and Changing Administrators.
![]() Log out.
Log out.
For details about logging out, see Administrator Logout Method.
![]() Disconnect this printer from the administrator-only access network, and then connect it to the general usage network environment.
Disconnect this printer from the administrator-only access network, and then connect it to the general usage network environment.