Before modifying a custom paper, confirm that no one is modifying it on Web Image Monitor or on the color controller.
You can only change the [Custom Paper Name], [Paper Size], [Apply Duplex], and [Apply Auto Paper Select] settings for a custom paper that is registered from the paper library.
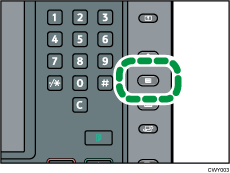
![]() Press the [Paper Setting] key.
Press the [Paper Setting] key.
![]() Press [Edit Custom Paper].
Press [Edit Custom Paper].
![]() Select the custom paper whose settings you want to modify.
Select the custom paper whose settings you want to modify.
Press [![]() Previous] or [
Previous] or [![]() Next] to scroll through the list to find the paper that you want to modify.
Next] to scroll through the list to find the paper that you want to modify.
![]() Change the settings.
Change the settings.
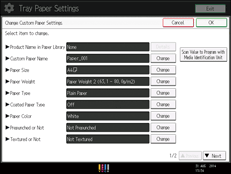
If you change the [Paper Weight], [Paper Type], [Coated Paper Type], [Paper Color], [Prepunched or Not], or [Textured or Not] and press [OK], a message appears to notify you that the [Advanced Settings] will be initialized. To apply the changes for those settings, select [Change]. To cancel the changes, select [Do not Change].
![]() Press [OK].
Press [OK].
![]() Press [Overwrite].
Press [Overwrite].
Press [Save As] to register the paper settings as another custom paper.
![]() Press [Yes].
Press [Yes].
![]() Press [Exit].
Press [Exit].
![]() Press the [Paper Setting] key.
Press the [Paper Setting] key.
You can also close the [Tray Paper Settings] screen by pressing [Exit].
![]()
For details about custom paper settings, see Custom Paper Settings.
You cannot modify a custom paper that is assigned to a paper tray. To modify it, cancel the assignment.
For details about [Advanced Settings], contact your machine administrator.