![]() Press the [Paper Setting] key.
Press the [Paper Setting] key.

![]() Press [Edit Custom Paper].
Press [Edit Custom Paper].
![]() Select the custom paper whose settings you want to modify.
Select the custom paper whose settings you want to modify.
Press [![]() Previous] or [
Previous] or [![]() Next] to scroll through the list to find the paper that you want to modify.
Next] to scroll through the list to find the paper that you want to modify.
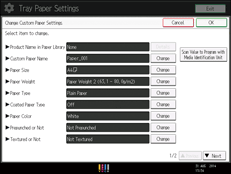
![]() Press [Scan Value to Program with Media Identification Unit].
Press [Scan Value to Program with Media Identification Unit].

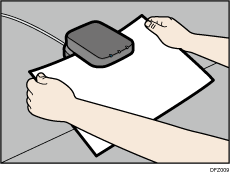
![]() Insert paper into the Media Identification Unit, and then remove it.
Insert paper into the Media Identification Unit, and then remove it.
Hold the edges of the paper with both hands when inserting the paper.
Keep the paper flat as you pull it out.

![]() Change the settings.
Change the settings.
If you change the [Paper Weight], [Paper Type], [Coated Paper Type], [Paper Color], [Prepunched or Not], or [Textured or Not] and press [OK], a message appears to notify you that the [Advanced Settings] will be initialized. To apply the changes for those settings, select [Change]. To cancel the changes, select [Do not Change].
![]() Press [OK].
Press [OK].
![]() Press [Overwrite].
Press [Overwrite].
Press [Save As] to register the paper settings as another custom paper.
![]() Press [Yes].
Press [Yes].
![]() Press [Exit].
Press [Exit].
![]() Press the [Paper Setting] key.
Press the [Paper Setting] key.
You can also close the [Tray Paper Settings] screen by pressing [Exit].
![]()
For details about custom paper settings, see Custom Paper Settings.
You cannot modify a custom paper that is assigned to a paper tray. To modify it, cancel the assignment.
For details about [Advanced Settings], contact your machine administrator.
