This section explains the settings you need to configure if you want to scan a large number of originals in several batches and send them together as a single job.
![]()
For details about the optional units required for this function, see "Functions Requiring Optional Configurations", Getting Started.
Batch
Scanning starts when you place additional originals and press the [Start] key. When all the originals have been scanned, press the [![]() ] key. The machine waits until additional originals are placed, regardless of the default settings.
] key. The machine waits until additional originals are placed, regardless of the default settings.
SADF
If [SADF] is selected, scanning starts as soon as you place additional originals in the ADF. Select which operation the machine performs while waiting for additional originals in [Wait Time for Next Original(s): SADF] under [Scanner Features]. For details about [Wait Time for Next Original(s): SADF], see Scan Settings![]() .
.
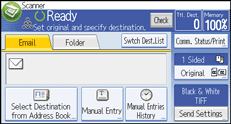
![]() Press [Send Settings].
Press [Send Settings].
![]() Press [
Press [![]() ] three times and then press [Batch] or [SADF].
] three times and then press [Batch] or [SADF].
![]() Press [OK].
Press [OK].
![]()
The [SADF] function is available only if the ADF is installed on the machine.
If [SADF] is selected, scanning starts as soon as you place additional originals in the ADF. However, in the following cases you must press the [Start] key to start scanning additional originals.
After scanning additional originals using the exposure glass
After changing settings while waiting for additional originals
After opening/closing the ADF
For more details about procedures, see Scanning Multiple Pages of Originals as One File
 .
.