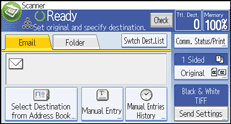
![]() Press [Send Settings].
Press [Send Settings].

![]() Press [
Press [![]() ] twice, and then press [Auto Density].
] twice, and then press [Auto Density].
![]() To adjust image density, press [
To adjust image density, press [![]() ] or [
] or [![]() ], at the left and right of [Auto Density].
], at the left and right of [Auto Density].
These keys increase or decrease the image density in single increments up to 7.
Selecting [Auto Density] corrects scanning density to improve resolution of paper types such as non-white paper like newspaper or transparent originals.
![]()
When scanning originals in full color, you can specify the [Auto Density] level in [Background Density of ADS (Full Color)] in [Send Settings] under [Scanner Features]. For details, see Scan Settings
 .
.
