Specifying the scan destination
This section describes how to specify a destination using the following keys:
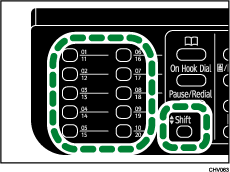
Quick Dial keys
Use these keys to specify destinations registered as Quick Dial entries Nos. 1 to 20.
[Address Book] key
Press the [Address Book] key to specify a destination registered in the machine's address book.
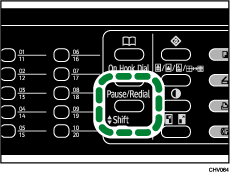
[Pause/Redial] key
Press this to specify the last used destination as the destination for the current job.
Using the Quick Dial keys
Press the [Quick Dial] key that the Quick Dial entry you want to use is assigned to.
If you want to use Quick Dial entries Nos. 11 to 20, press the [Shift] key before the [Quick Dial] key.

Using the [Address Book] key
Press the [Scanner] key.
Press the [Address Book] key.
Press the [
 ] or [
 ] key to specify a search method, and then press the [OK] key.
Search by name: [Search by Name]
Enter part of the name using the number keys.
Search by destination list: [Display List]
Registered destinations are displayed in order.
Search by registration number: [Search by Registration No.]
Enter the three-digit registration number using the number keys. The registered name is displayed.
Search by e-mail address: [Search by Email Address]
Enter the e-mail address you want to search for. The registered address is displayed.
Select the destination you want.
Press the [OK] key.
Using the [Pause/Redial] key
You can specify the most recent destination specified as the destination for the current job.

![]()
To add another destination, press [Add Dest], and then enter an e-mail address or its folder path. Press [
 ] or [
 ] to see the list of destinations that have been added so far.
Press [Manual] to enter the destination manually. If you want to change the destination, press [EditDest], and then enter the new destination.
If paper is jammed in the ADF, the jammed page has not been scanned properly. For details about how to remove the paper jammed in the ADF, see Removing Paper Jammed in the Auto Document Feeder
 .
.

