Removing Scanning Jams (Type 1 model)
When the following message appears on the screen, follow the procedure below to remove the original jammed in the ADF:
"ADF Orig. Misfeed Open ADF Cover and remove paper."
![]()
|
![]() Open the ADF cover.
Open the ADF cover.
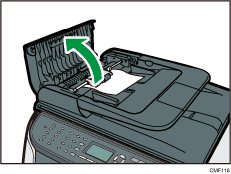
![]() Gently pull the jammed original to remove it. Be careful not to pull the original too hard, as it may rip.
Gently pull the jammed original to remove it. Be careful not to pull the original too hard, as it may rip.
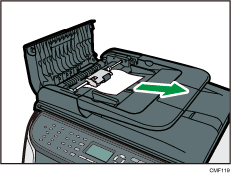
![]() If you cannot pull out the jammed original easily, move the lever slightly to the machine rear, and then raise it to unlock the paper feed roller.
If you cannot pull out the jammed original easily, move the lever slightly to the machine rear, and then raise it to unlock the paper feed roller.
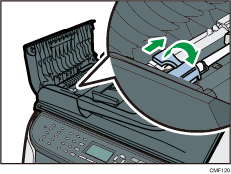
![]() Lift the paper feed roller slightly and pull it out toward you.
Lift the paper feed roller slightly and pull it out toward you.
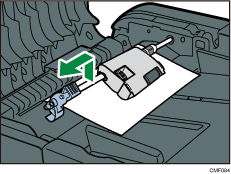
![]() Gently pull the jammed original to remove it.
Gently pull the jammed original to remove it.
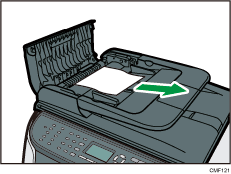
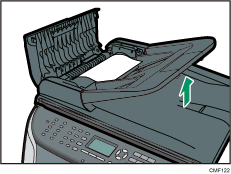
![]() If you cannot pull out the jammed original easily, raise the input tray to see if the original is jammed in the output area.
If you cannot pull out the jammed original easily, raise the input tray to see if the original is jammed in the output area.
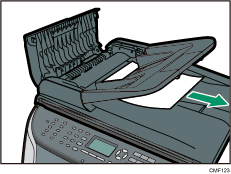
![]() Gently pull the jammed original to remove it.
Gently pull the jammed original to remove it.
![]() Put the paper feed roller back in with the roller part facing downwards.
Put the paper feed roller back in with the roller part facing downwards.
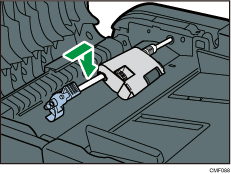
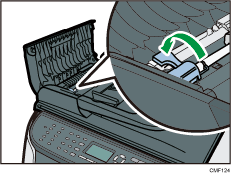
![]() Lower the lever to lock the paper feed roller.
Lower the lever to lock the paper feed roller.
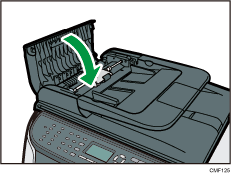
![]() Close the ADF cover.
Close the ADF cover.
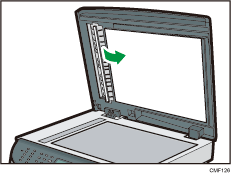
![]() Lift the ADF, and if there is original remaining in the ADF, gently pull the jammed original to remove it.
Lift the ADF, and if there is original remaining in the ADF, gently pull the jammed original to remove it.
Be careful not to hold the input tray when lifting the ADF, for the tray might be damaged.
![]() Close the ADF.
Close the ADF.

