Modifying fax destinations
This section describes how to modify the information of registered destinations.
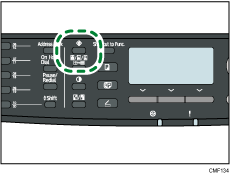
![]() Press the [User Tools] key.
Press the [User Tools] key.

![]() Press the [
Press the [![]() ][
][![]() ] keys to select [Address Book], and then press the [OK] key.
] keys to select [Address Book], and then press the [OK] key.
![]() If you are requested to enter a password, enter the password using the number keys, and then press the [OK] key.
If you are requested to enter a password, enter the password using the number keys, and then press the [OK] key.
![]() Press the [
Press the [![]() ][
][![]() ] keys to select [Quick Dial Dest.] or [Fax Speed Dial Dest.], and then press the [OK] key.
] keys to select [Quick Dial Dest.] or [Fax Speed Dial Dest.], and then press the [OK] key.
![]() Press the [
Press the [![]() ][
][![]() ] keys to select [No.], and then enter the desired Quick Dial number (1 to 20) or Speed Dial number (1 to 200) using the number keys.
] keys to select [No.], and then enter the desired Quick Dial number (1 to 20) or Speed Dial number (1 to 200) using the number keys.
The fax number and fax name registered for that number appear.
![]() Press the [
Press the [![]() ][
][![]() ] keys to select [Fax No.], and then modify the fax number (up to 40 characters).
] keys to select [Fax No.], and then modify the fax number (up to 40 characters).
![]() Press the [
Press the [![]() ][
][![]() ] keys to select [Name], and then modify the fax name (up to 20 characters).
] keys to select [Name], and then modify the fax name (up to 20 characters).
![]() Confirm the setting, and then press the [OK] key.
Confirm the setting, and then press the [OK] key.
![]() Press the [User Tools] key to return to the initial screen.
Press the [User Tools] key to return to the initial screen.
![]()
You can press the [Escape] key to exit to the previous level of the menu tree.
A password for accessing the [Address Book] menu can be specified in [Admin. Tools Lock].
![]()
For details about [Admin. Tools Lock], see Administrator Settings
 .
.For details about entering characters, see Entering Characters
 .
.

