Normally, originals are scanned according to their size, which the machine detects automatically. However, you can specify the scan area manually also. Specifying the scan area manually can be useful for cropping excess border space around an image.
Scan size settings are as follows:
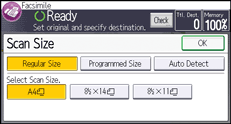
Regular Size
The placed original is scanned according to specified standard size regardless of actual size.
The sizes that can be specified are A4![]() , 81/2 × 11
, 81/2 × 11![]() , and 81/2 × 14
, and 81/2 × 14![]() .
.
Programmed Size
Only the area in the specified size is scanned regardless of the actual size of a placed original.
Two sizes can be registered in advance. You must first register the sizes of the originals that you want to scan in "Program/Change Scan Size" on the Facsimile Features menu. See Programming/Changing a Scan Size![]() .
.
Auto Detect
![]() (mainly Europe and Asia)
(mainly Europe and Asia)
The machine can detect the following sizes of originals automatically when using:
ADF: A4
 and A5
Exposure glass: A4

![]() (mainly North America)
(mainly North America)
The machine can detect the following sizes of originals automatically when using:
ADF: 81/2 × 11
 , 81/2 × 14
 , and 51/2 × 81/2
Exposure glass: 81/2 × 11

If the machine cannot detect the original size, a confirmation message appears. Place the original again.
![]() Press [Send Settings].
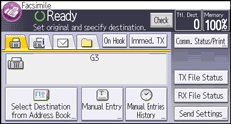
Press [Send Settings].

![]() Press [Scan Size].
Press [Scan Size].
![]() Select [Regular Size], [Programmed Size], or [Auto Detect].
Select [Regular Size], [Programmed Size], or [Auto Detect].
![]() If you selected [Regular Size] in step 3, select a size.
If you selected [Regular Size] in step 3, select a size.

![]() If you selected [Programmed Size] in step 3, select [Area 1] or [Area 2].
If you selected [Programmed Size] in step 3, select [Area 1] or [Area 2].
![]() Press [OK] twice.
Press [OK] twice.
