Specifying envelope size for the bypass tray
![]()
The envelope size selected using the printer driver overrides that selected using the control panel, so do not make settings using the control panel if you have already made settings using the printer driver.
When [Machine Setting(s)] is selected for [Tray Setting Priority] under [Machine Modes] in [Print Settings], any settings made using the printer's control panel have priority over any settings made using the printer driver.
For details about the printer driver, see the printer driver Help.
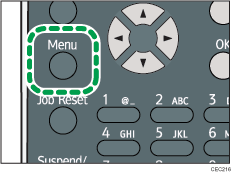
![]() Press the [Menu] key.
Press the [Menu] key.

![]() Press the [
Press the [![]() ] or [
] or [![]() ] key to select [Paper Input], and then press the [OK] key.
] key to select [Paper Input], and then press the [OK] key.

![]() Press the [
Press the [![]() ] or [
] or [![]() ] key to select [Paper Size:Bypass Tray], and then press the [OK] key.
] key to select [Paper Size:Bypass Tray], and then press the [OK] key.

![]() Select the envelope type using the scroll keys, and then press the [OK] key.
Select the envelope type using the scroll keys, and then press the [OK] key.

![]() Press the [Menu] key.
Press the [Menu] key.
![]()
Confirm that the top of the stack is not higher than the limit mark on the side guides.
Do not push the stack of envelopes with too much force.
Confirm that the edges of envelopes fit under the side guides.
After specifying the paper size, specify a paper type such as [Envelope] using the control panel or printer driver. For details on specifying a paper type using the control panel, see Specifying a paper type for the bypass tray.
For details about the printer driver, see the printer driver Help.

