Loading Envelopes into a Standard or Optional Paper Feed Tray
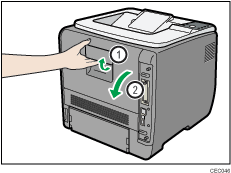
![]() Open the rear cover.
Open the rear cover.
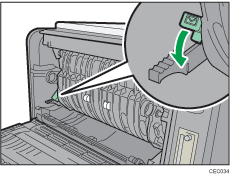
![]() Use the envelope lever.
Use the envelope lever.
Raising the envelope lever reduces roller pressure.
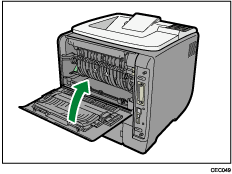
![]() Close the rear cover.
Close the rear cover.
![]() Lift and pull tray carefully, and then pull it out with both hands.
Lift and pull tray carefully, and then pull it out with both hands.
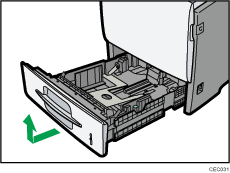
Place the tray on a flat surface.
![]() Pinch the side guides, and then slide them outward until they stop.
Pinch the side guides, and then slide them outward until they stop.
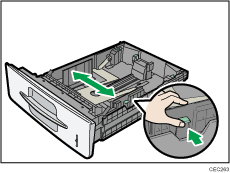
![]() Pinch the rear guide, and then slide it toward the back.
Pinch the rear guide, and then slide it toward the back.
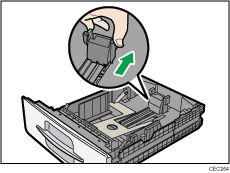
![]() Fan envelopes, and then align their edges before loading.
Fan envelopes, and then align their edges before loading.
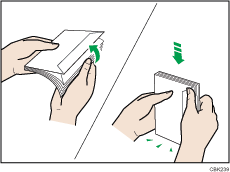
When fanning envelopes, make sure the envelope flaps are not stuck together. If they are stuck together, separate them.
Before loading envelopes, flatten them out so that their curl does not exceed that shown in the illustration below.
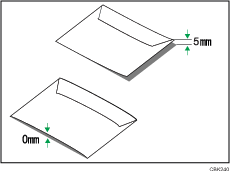
If the curl is severe, flatten out the envelopes using your fingers, as shown in the illustration below.
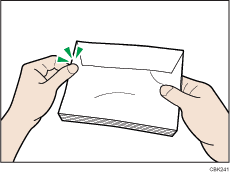
If envelopes are severely curled after printing, flatten them by bending them back against the curl.
![]() Load envelopes into the paper tray, with the print side down and the flap on the left as shown in the illustration.
Load envelopes into the paper tray, with the print side down and the flap on the left as shown in the illustration.
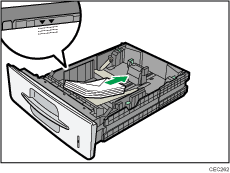
![]() Pinch the side guides, and then slide them along the edge of the envelope stack.
Pinch the side guides, and then slide them along the edge of the envelope stack.
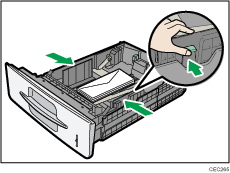
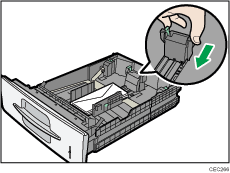
![]() Pinch the rear guide, and then slide it along the edge of the envelope stack.
Pinch the rear guide, and then slide it along the edge of the envelope stack.
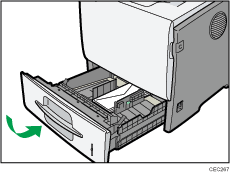
![]() Hold the tray with both hands, slide it along the rails of the printer body, and then push it straight in.
Hold the tray with both hands, slide it along the rails of the printer body, and then push it straight in.
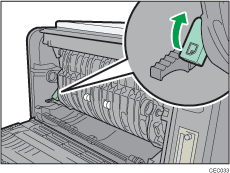
![]()
Keep the envelope lever lowered when printing normally.
