

  |  | ||
This section describes how to register destinations using the control panel.
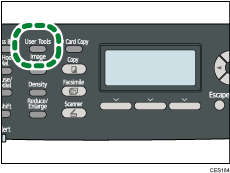
Press the [User Tools] key.

Press the [![]() ][
][![]() ] keys to select [Address Book], and then press the [OK] key.
] keys to select [Address Book], and then press the [OK] key.
If you are requested to enter a password, enter the password using the number keys, and then press the [OK] key.
Press the [![]() ][
][![]() ] keys to select [Quick Dial Dest.] or [Fax Speed Dial Dest.], and then press the [OK] key.
] keys to select [Quick Dial Dest.] or [Fax Speed Dial Dest.], and then press the [OK] key.
Press the [![]() ][
][![]() ] keys to select [No.], and then enter the desired Quick Dial number (1 to 20) or Speed Dial number (1 to 200) using the number keys.
] keys to select [No.], and then enter the desired Quick Dial number (1 to 20) or Speed Dial number (1 to 200) using the number keys.
If a destination is already registered for the input number, the fax number and fax name registered for that number appear.
Press the [![]() ][
][![]() ] keys to select [Fax No.], and then enter the fax number (up to 40 characters).
] keys to select [Fax No.], and then enter the fax number (up to 40 characters).
Press the [![]() ][
][![]() ] keys to select [Name], and then enter the fax name (up to 20 characters).
] keys to select [Name], and then enter the fax name (up to 20 characters).
Confirm the setting, and then press the [OK] key.
Press the [User Tools] key to return to the initial screen.
![]()
You can press the [Escape] key to exit to the previous level of the menu tree.
A fax number can contain 0 to 9, pause, "![]() ", "
", "![]() ", and space.
", and space.
If necessary, insert a pause in the fax number. The machine pauses briefly before it dials the digits following the pause. You can specify the length of the pause time in the [Pause Time] setting under fax transmission settings.
To use tone services on a pulse-dialing line, insert "![]() " in the fax number. "
" in the fax number. "![]() " switches the dialing mode from pulse to tone temporarily.
" switches the dialing mode from pulse to tone temporarily.
If the machine is connected to the telephone network through a PBX, make sure to enter the outside line access number specified in [PBX Access Number] before the fax number.
Use Web Image Monitor to register an Internet Fax destination (an e-mail address).
A password for accessing the [Address Book] menu can be specified in [Admin. Tools Lock].
![]()
For details about entering characters, see Entering Characters.
For details about [Pause Time], see Fax Transmission Settings.
For details about [PBX Access Number], see Administrator Settings.
For details about registering an Internet Fax destination, see Registering Fax Destinations Using Web Image Monitor.
For details about [Admin. Tools Lock], see Administrator Settings.