

  |  | ||
This section describes the basic operation for sending scanned files to a USB flash disk.
![]()
The original in the ADF takes precedence over the original on the exposure glass if you place originals both in the ADF and on the exposure glass.
This machine does not support the use of USB flash disks connected to external USB hubs. Insert your USB flash disk directly into the USB flash disk port located at the top left corner of the machine.
Certain types of USB flash disks cannot be used.
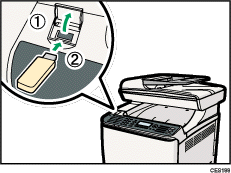
Insert your USB flash disk into the USB flash disk port.

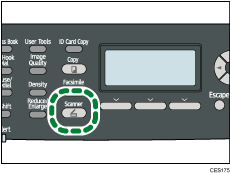
Press the [Scanner] key.

"Loading..." appears on the display. Wait until the display changes to show "Save Scn Data to USB" (the duration depends on your USB flash disk).
Place the original on the exposure glass or in the ADF.
If necessary, configure advanced scan settings.
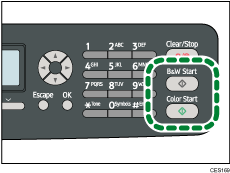
Press the [B&W Start] key or the [Color Start] key.

To scan in black and white, press the [B&W Start] key.
To scan in color, press the [Color Start] key.
Depending on the machine's setting, you will see the following screen on the display.
When in halftone black-and-white scanning mode:

When in color or gray scale black-and-white scanning mode:

Press the appropriate selection key according to the desired file format.
Depending on the machine's settings, you may see the following screen on the display when scanning from the exposure glass.

If you see this screen, proceed to the next step. If not, proceed to step 8.
If you have more originals to scan, place the next original on the exposure glass, and then press [Yes]. Repeat this step until all originals are scanned.
When all originals have been scanned, press [No] to start sending the scanned file.
Confirm that "Ready" appears on the display.
The scanned file is created in the root directory of the USB flash disk.
Remove the USB flash disk from the machine.
Make sure to close the cover of the USB flash disk port after use.
![]()
To cancel scanning, press the [Scanner] key, and then press the [Clear/Stop] key. The scan files are discarded.
You can configure the machine to perform black-and-white scanning in halftone or grayscale by changing [B&W Scanning Mode] setting under scanner settings.
If the [Limitless Scan] setting under scanner settings is enabled, you can place originals on the exposure glass repeatedly in a single scan procedure.
If the [File Type] setting under scanner settings is enabled, you can scan multiple pages to create a single PDF or TIFF file containing all pages. However, if the file format is JPEG, a single-page file will be created for every page scanned.
If paper is jammed in the ADF, the scan job will be put on hold. To resume the current job, remove the jammed paper and scan the originals again starting from the jammed page.
![]()
To place the original, see Placing Originals.
To configure advanced scan settings, see Specifying the Scan Settings.
For details about [B&W Scanning Mode], [Limitless Scan], or [File Type], see Scanner Settings.
For details about how to remove the paper jammed in the ADF, see Removing Scanning Jams.