Setting Custom Size Paper Using the Control Panel
Follow the procedure below to set the machine using the control panel when loading custom size paper onto the bypass tray.
![]()
If you select [Machine Setting(s)] in [Bypass Tray] under [Tray Setting Priority] in [System] of [Printer Features], the settings made using the control panel have priority over the printer driver settings. For details about [System] settings, see "System".
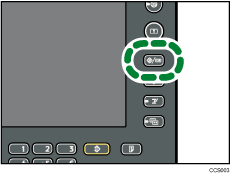
![]() Press the [User Tools/Counter] key on the control panel.
Press the [User Tools/Counter] key on the control panel.

![]() Press [System Settings].
Press [System Settings].
![]() Press the [Tray Paper Settings] tab.
Press the [Tray Paper Settings] tab.
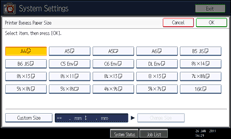
![]() Press [Printer Bypass Paper Size].
Press [Printer Bypass Paper Size].
![]() Press [Custom Size].
Press [Custom Size].

If a custom size is already set, press [Change Size].
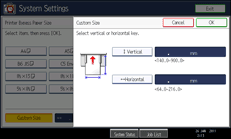
![]() Press [Vertical], enter the vertical size of the paper using the number keys, and then press [
Press [Vertical], enter the vertical size of the paper using the number keys, and then press [![]() ].
].

![]() Press [Horizontal], enter the horizontal size of the paper using the number keys, and then press [
Press [Horizontal], enter the horizontal size of the paper using the number keys, and then press [![]() ].
].
![]() Press [OK].
Press [OK].
The paper sizes entered are displayed.
![]() Press [OK].
Press [OK].
![]() Press the [User Tools/Counter] key.
Press the [User Tools/Counter] key.
The initial screen appears.
![]()
When loading thick paper, thin paper or OHP transparencies, set paper size and paper type.
The default paper size for the bypass tray is as follows:
 (mainly Europe and Asia)
A4

 (mainly North America)
81/2 × 11

For details about setting printer drivers, see the printer driver Help.

