


  |  | ||
![]()
Confirm that the setting of the paper size dial matches the paper size and feed direction of the paper in the tray, otherwise the printer might be damaged, or printing problems might occur.
If you want to use the paper size and feed direction that are not indicated on the paper size dial, set the dial to "![]() ". In this case, you should set the paper size using the control panel.
". In this case, you should set the paper size using the control panel.
Confirm that the catches return to their original positions securely. If they are not locked securely, paper misfeeds might occur.
To avoid damage, pinch the paper guides when moving them.
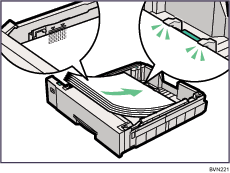
Confirm that the top of the stack is not higher than the limit mark inside the tray.
Confirm that paper fits under the rear guide.
Do not slide the paper tray in with force. If you do, the front and side guides might move.
The following explanation uses the example of "Tray 1" for the paper tray.
Lift the paper tray slightly, and then pull it out until it stops. Adjust the paper size dial to match the size and feed direction of paper in the paper tray.
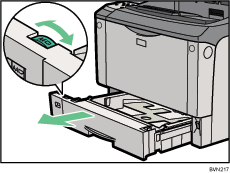
Lift the front side of the tray, and then pull it out of the printer.
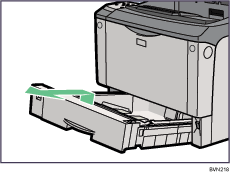
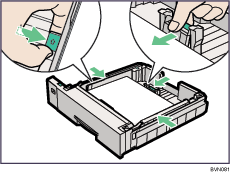
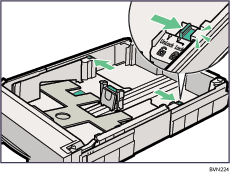
Pinch the green clips on the side guide and the end guide, and then adjust the guides to the paper size being loaded.
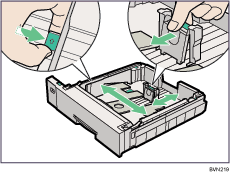
Slide the two green switches into one of the two positions according to the thickness of the paper you are loading. If the paper is 157 g/m2 (42 lb.) or thicker, slide both switches into the rear (thick) position. If the paper is lighter than 157 g/m2 (42 lb.), slide both switches into the forward (thin) position.
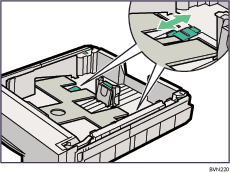
Make sure that the positions of both switches are the same.
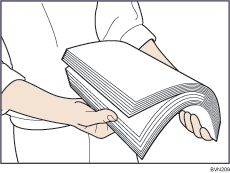
Fan the paper before loading paper in the paper tray.
Load paper into the tray with the print side down.
Adjust the paper guides to close any gaps.
Do not move paper loaded in the tray more than a few millimeters.
Excessive movement of loaded paper can cause edges of sheets to snag on the openings of the tray's lifting plate, resulting in sheets being folded or becoming jammed.
If you load paper larger than A4![]() , you should extend the tray as follows:
, you should extend the tray as follows:
Slide the catches inwards to unlock the tray.
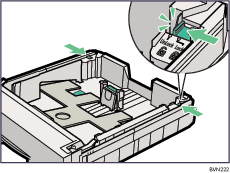
Slide the tray until it stops.
Return the catches to their original positions.
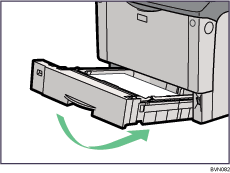
Lift the front end of the tray, and then carefully slide the tray into the printer until it stops.
If you pulled out the tray extension in step 9, cover the area of the tray that is exposed at the rear of the printer by attaching the paper tray cover (supplied with the printer).
![]()
You cannot load paper smaller than A4![]() , if the tray is extended. In this case, return the tray to its standard length.
, if the tray is extended. In this case, return the tray to its standard length.
Do not install the paper tray cover if the duplex unit is installed.