Ethernet Configuration
If connecting the printer to a network using an Ethernet cable, set the necessary settings, depending on the network environment, on the control panel.
Web Image Monitor or Smart Organizing Monitor can be used for the settings related to the IP address.
![]()
The following are settings that can be set at the [Host Interface] menu and their default values.
Setting Name |
Value |
|
|---|---|---|
DHCP |
On |
|
MAC Address |
XX-XX-XX-XX-XX-XX |
|
IP Address |
192.0.0.192 |
|
Subnet Mask |
255.255.255.0 |
|
Gateway Address |
192.0.0.192 |
|
Frame Type (NW) |
Auto Select |
|
Active Protocol |
|
|
Ethernet Speed |
Auto Select |
|
![]()
If [DHCP] is in use, the IP address, subnet mask, and gateway address are all set automatically.
Each printer has a unique [MAC Address] value.
Set the Ethernet speed if necessary.
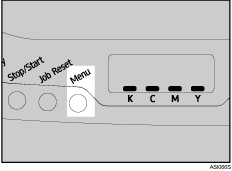
![]() Press the [Menu] key.
Press the [Menu] key.

![]() Press the [
Press the [![]() ] or [
] or [![]() ] key to display [Host Interface], and then press the [#Enter] key.
] key to display [Host Interface], and then press the [#Enter] key.
| Menu: Host Interface |
![]() Press the [
Press the [![]() ] or [
] or [![]() ] key to display [Network Setup], and then press the [#Enter] key.
] key to display [Network Setup], and then press the [#Enter] key.
| Host Interface: Network Setup |
![]() Press the [
Press the [![]() ] or [
] or [![]() ] key to display [Active Protocol], and then press the [#Enter] key.
] key to display [Active Protocol], and then press the [#Enter] key.
| Network Setup: Active Protocol |
![]() Press the [
Press the [![]() ] or [
] or [![]() ] key to display [TCP/IP], and then press the [#Enter] key.
] key to display [TCP/IP], and then press the [#Enter] key.
| Active Protocol: TCP/IP |
This example shows how to activate TCP/IP.
![]() Press the [
Press the [![]() ] or [
] or [![]() ] key to display [Active], and then press the [#Enter] key.
] key to display [Active], and then press the [#Enter] key.
| TCP/IP: Active |
Press the [Escape] key until the screen returns to the [Network Setup] menu.
![]() Press the [
Press the [![]() ] or [
] or [![]() ] key to display [DHCP], and then press the [#Enter] key.
] key to display [DHCP], and then press the [#Enter] key.
| Network Setup: DHCP |
![]() Press the [
Press the [![]() ] or [
] or [![]() ] key to select [Off], and then press the [#Enter] key.
] key to select [Off], and then press the [#Enter] key.
| DHCP: Off |
The address detected by the printer will appear.
![]() To specify the IP Address. Press the [
To specify the IP Address. Press the [![]() ] or [
] or [![]() ] key to display [IP Address], and then press the [#Enter] key.
] key to display [IP Address], and then press the [#Enter] key.
| Network Setup: IP Address |
![]() Press the [
Press the [![]() ] or [
] or [![]() ] key to enter the address.
] key to enter the address.
Press the [![]() ] or [
] or [![]() ] key to enter the left most entry field of the address.
] key to enter the left most entry field of the address.
To go to the next field, press the [#Enter] key.
To go back to the previous field, press the [Escape] key.
![]() After setting values for all fields, press the [#Enter] key.
After setting values for all fields, press the [#Enter] key.
The [IP Address] menu appears.
![]() Set the subnet mask and gateway address. Press the [
Set the subnet mask and gateway address. Press the [![]() ] or [
] or [![]() ] key to select [Subnet Mask] or [Gateway Address], and then press the [#Enter] key.
] key to select [Subnet Mask] or [Gateway Address], and then press the [#Enter] key.
Set values for each setting following the same procedure as for the IP address.
![]() After completing the settings, return to the initial screen by pressing the [Menu] key.
After completing the settings, return to the initial screen by pressing the [Menu] key.

