Using DHCP - Detecting the Network Address Automatically
![]()
When you use this printer in the DHCP environment, select [DHCP] following this procedure.
When [DHCP] is selected, you cannot make settings for the following items:
IP Address
Subnet Mask
Gateway Address
Consult your network administrator for information about making network settings.
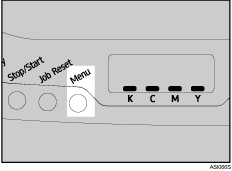
![]() Press the [Menu] key.
Press the [Menu] key.

![]() Press the [
Press the [![]() ] or [
] or [![]() ] key to display [Host Interface], and then press the [#Enter] key.
] key to display [Host Interface], and then press the [#Enter] key.
| Menu: Host Interface |
![]() Press the [
Press the [![]() ] or [
] or [![]() ] key to display [Network Setup], and then press the [#Enter] key.
] key to display [Network Setup], and then press the [#Enter] key.
| Host Interface: Network Setup |
![]() Press the [
Press the [![]() ] or [
] or [![]() ] key to display [DHCP], and then press the [#Enter] key.
] key to display [DHCP], and then press the [#Enter] key.
| Network Setup: DHCP |
![]() Press the [
Press the [![]() ] or [
] or [![]() ] key to select [On], and then press the [#Enter] key.
] key to select [On], and then press the [#Enter] key.
| DHCP: On |
The address detected by the printer will appear.
![]() Press the [Menu] key.
Press the [Menu] key.
The initial screen appears.
![]() Print a configuration page to confirm the settings made.
Print a configuration page to confirm the settings made.
![]()
For details about printing the configuration page using control panel, see Test Printing
 .
.

