Basic Procedure for Sending Scan Files Using WSD
This section explains the basic procedure for sending scan files using WSD.
![]()
If the message “Updating the destination list has failed. Try again?” appears, press [OK]. The destination list will then be updated.
![]() Make sure that no previous settings remain.
Make sure that no previous settings remain.
If a previous setting remains, press the [Clear Modes] key.
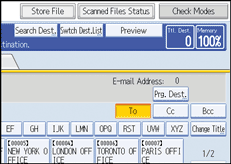
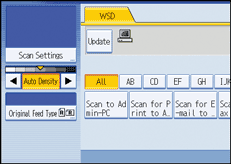
![]() If the E-mail screen, Scan to Folder screen, or network delivery scanner screen is displayed, switch to the WSD scanner screen.
If the E-mail screen, Scan to Folder screen, or network delivery scanner screen is displayed, switch to the WSD scanner screen.
For details, see "Switching to the WSD Scanner Screen".

![]() Place originals.
Place originals.
![]() If necessary, press [Scan Settings] to configure the scan settings.
If necessary, press [Scan Settings] to configure the scan settings.

Note that only [Erase Border] can be specified directly from this machine. Use the client computer to configure the other scan settings. For details, see "Changing a Scan Profile".
![]() If necessary, specify the scanning density.
If necessary, specify the scanning density.
For details, see "Adjusting Image Density".
![]() If necessary, press [Original Feed Type] to configure the stamp and original orientation settings.
If necessary, press [Original Feed Type] to configure the stamp and original orientation settings.
For details, see "Setting of Original Feed Type".
![]() Specify the destination.
Specify the destination.
For details, see "Specifying the Destination Client Computer".
![]() Press the [Start] key.
Press the [Start] key.
When scanning batches, place subsequent originals after the scan files have been sent.
![]()
If you are using this machine as a WSD scanner, you can specify only one destination per scan job.
You cannot preview scanned images. After pressing the [Start] key, you can view the scanned images on your computer.
To cancel a specified destination, press the destination again, or press the [Clear/Stop] key.
To cancel scanning, press the [Clear/Stop] key.
You cannot store files scanned using WSD on the machine.
You cannot use WSD to send files stored on the machine.
You cannot scan originals while other originals are being scanned.
When two-sided originals are being scanned, [Page Opening Orientation] is set to [Top to Top].
If scanning takes too long, the computer might time out, causing the error message [Automatic Scanning could not be completed] to appear. If this happens, the scan files are sent again. To check the files have been sent successfully, use the machine's Scanned Files Status screen or a client computer. For details, see "Scanned Files Status".
If scanning does not begin after you press the [Start] key, the machine might not be registered to the computer or the profile might be incorrectly configured. For details, see "Registering the Machine to the client computer" or "Creating a New Scan Profile".
After scan files are sent, their destination settings are automatically cleared. If you want to preserve this information, contact your local dealer for details.

