
| |||
Replace all the friction pads in the tray. The following procedure shows how to replace the tray's friction pad (Tray 1).
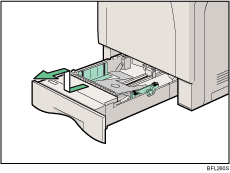
Carefully slide the paper tray (Tray 1) out, until it stops. Then, lift the front slightly, and then pull the tray completely out.
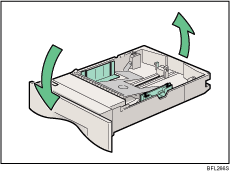
Remove paper from the paper tray. Place the tray upside down on a flat surface.
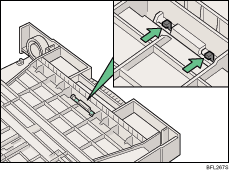
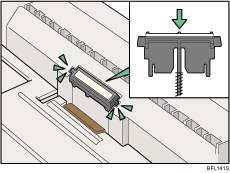
Use a pointed implement such as a ball-point pen, to carefully press down the two catches securing the friction pad.
The friction pad may fall away when released. Place your hand over the friction pad while pressing the catches.
The friction pad spring may come loose. Be careful not to lose the friction pad.
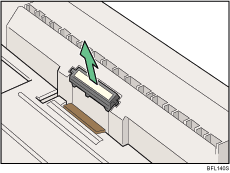
Turn the paper tray right way up, and remove the friction pad from the tray.
The friction pad spring may come loose. Be careful not to lose the friction pad spring.
Insert the new friction pad in the paper tray.
Place the spring over the central prong of the new friction pad and align the friction pad with the grooves of the paper tray. Carefully pull the flexible cover in front of the friction pad. Then push down the friction pad until it clicks into place.
After pushing down the friction pad, check it is properly installed by pressing it lightly. If it is properly installed, it will spring back up.
Follow the same procedure to replace optional paper feed unit friction pads.
| Copyright (C) 2007 |