

  |  | ||
Prepare a hub and other network devices, and connect the Ethernet cable to the printer.
Connect 10BASE-T or 100BASE-TX cable to the printer's Ethernet port. For 1000BASE-T, the optional Gigabit Ethernet board is available.
![]()
A network interface cable with a ferrite core must be used for RF interference suppression.
For users outside the United States of America: properly shielded and grounded cables and connectors must be used for connections to a host computer (and/or peripheral) in order to meet emission limits.
For users in the United States of America: properly shielded and grounded cables and connectors must be used for connections to a host computer (and/or peripheral) in order to meet FCC emission limits.
![]()
An Ethernet cable is not supplied with this printer. Select your cable according to the network environment.
The printer's Ethernet and USB ports are not available when the Gigabit Ethernet board is attached to the printer.
Connecting to the standard Ethernet port
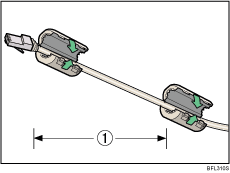
Attach one ferrite core at the printer end of the Ethernet cable, and then attach the other ferrite core about 10 cm (4 inches) (![]() ) from this core.
) from this core.

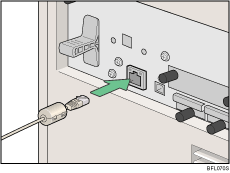
Connect the Ethernet cable to the Ethernet port that is located on the left side of the printer.

Connect the other end of the cable to the network, for example using a hub.
Connecting to the Ethernet port of the Gigabit Ethernet board
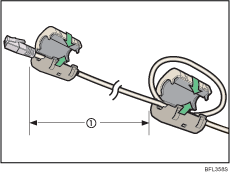
Attach two ferrite cores to the Ethernet cable.
Attach the core supplied with the printer to the connector end, and the one supplied with the Gigabit Ethernet board about 10 cm (4 inches) from the connector end (![]() ), making a loop as shown.
), making a loop as shown.

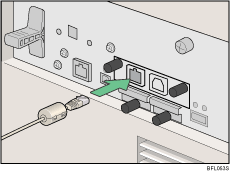
Connect the Ethernet cable to the Ethernet port of the Gigabit Ethernet board.

Connect the other end of the cable to the network, for example using a hub.
![]()
For details about configuring the network environment, see "Ethernet Configuration".
For details about attaching the gigabit ethernet board, see "Installing the Gigabit Ethernet Board".