Specifying Settings on the Control Panel
Make the following network settings according to the network interface you are using.
If you have connected the printer to a network, make the required network environment settings.
The following table shows the control panel settings and their default values. These items appear in the [Network Setup] menu.
Setting Name |
Value |
|---|---|
1.DHCP |
On |
2.IP Address |
0.0.0.0 |
3.Subnet Mask |
0.0.0.0 |
4.Gateway Address |
0.0.0.0 |
5.Active Protocol |
TCP/IP: Active |
6.Ethernet Speed |
Auto Select |
The following example explains making settings for TCP/IP.
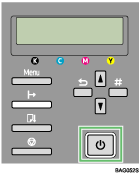
Press the [Power] key.

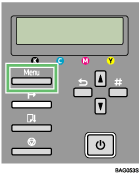
Press the [Menu] key.

The Menu screen appears on the display.
Press the [
 ] or [
 ] key to display the [Host Interface] menu, and then press the [#Enter] key.
Menu:
Host InterfacePress the [
 ] or [
 ] key to display [Network Setup], and then press the [#Enter] key.
Host Interface:
Network SetupPress the [
 ] or [
 ] key to select [IP Address], and then press [#Enter] key.
Network Setup
IP AddressThe current IP address appears on the display.
Press the [
 ] or [
 ] key to enter the left most entry field of the IP address, and then press the [#Enter] key.
IP Address:
 . 0. 0. 0
 To get an IP address for the printer, contact your network administrator.
The value moves by 10 if the [
 ] or [
 ] key is kept pressed.
When the [#Enter] key is pressed, the cursor moves to the next field.
Press the [#Enter] key.
As the specified value is entered in each field, the cursor moves to the next field.
IP Address:
192. . 0. 0
Repeating the steps, specify values in all fields, and then press the [#Enter] key.
To return to the previous field, press the [Escape] key.
Specify “Subnet Mask” and “Gateway Address” in the same way as when specifying the IP address.
After you have made all the settings, press the [Online] key.
The specified settings are set and the initial printer screen reappears.
You can print the configuration page to confirm the specified settings.
![]()
For details about how to print a configuration page, see Printing a Configuration Page.

