

  |  | ||
Follow the procedure below to perform a thorough print-head cleaning.
Since this consumes more ink than a normal head cleaning does, perform this when the problem persists after performing a normal head cleaning.
When the print cartridge is empty, replace it instead of performing a print-head cleaning. After a print cartridge is replaced, a print-head cleaning will be automatically performed.
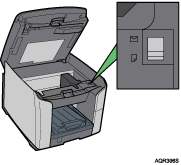
Slide the envelope selector![]() to the forward position.
to the forward position.

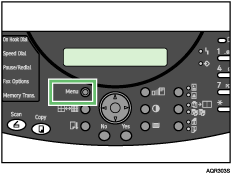
Press the [Menu] key.

Press the [![]() ] or [
] or [![]() ] key to display [Maintenance], and then press the [Yes] key.
] key to display [Maintenance], and then press the [Yes] key.
| Maintenance? OK=Yes / or 1-9 |
Press the [![]() ] or [
] or [![]() ] key to display [Head-flushing], and then press the [Yes] key.
] key to display [Head-flushing], and then press the [Yes] key.
| 3 Head-flushing? OK=Yes |
Press the [![]() ] or [
] or [![]() ] key to select the color of the print head you want to clean, and then press the [Yes] key. You can select [All Heads], [Print-head 2], or [Print-head 1].
] key to select the color of the print head you want to clean, and then press the [Yes] key. You can select [All Heads], [Print-head 2], or [Print-head 1].
| *All Heads |
Head flushing starts.
Press the [No] key to display “Cancel?”, and then press the [Yes] key.
| Cancel? Yes / Continue=No |
The Maintenance screen appears.
Press the [No] key.
The initial screen appears.