Sharing the Printer on Print Server
You can print from another computer on the network using the port on a print server. The machine does not need to be connected to the network when printing.
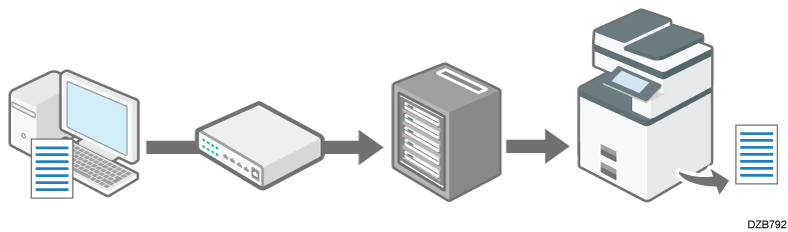
-
To use a Windows print server, specify the printer share settings on the print server, and then install the printer driver to the machine.
-
To use other print servers, see the operation manual for the print server.
-
Log on to Windows of the server computer as an administrator, and install the printer driver.
When using Windows 11, proceed to Step 4. -
Display the [Devices and Printers] dialog box.
Windows 10 (version 1703 or later), Windows Server 2019/2022
-
On the [Start] menu, click [Windows System]
 [Control Panel].
-
Click [View devices and printers].
Windows 10 (earlier than version 1703), Windows Server 2016
-
Right-click [Start], and then click [Control Panel].
-
Click [View devices and printers].
Windows 8.1, Windows Server 2012/2012 R2
-
On the Charm Bar, click [Set]
[Control Panel]. -
Click [View devices and printers].
-
-
Right-click the machine's icon, and then click [Printer properties].
Proceed to Step 6. -
Display the [Printers & scanners] dialog box.
-
Right-click [Start], and then click [System].
-
Click [Bluetooth & devices]
[Printers & scanners].
-
-
Click the machine's driver, and then [Printer properties].
-
Select the [Share this printer] check box on the [Sharing] tab.
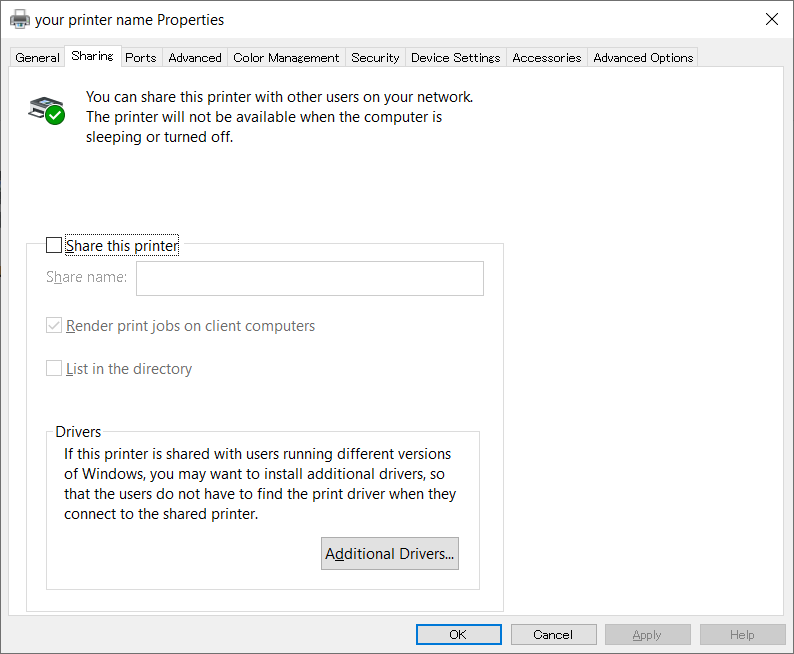
-
To share the printer with the user who uses Windows of the other version, click [Additional Drivers].
When you select the [Shared] check box to install alternative driver, this procedure is not required. -
Click [OK] to close the Printer Properties screen.

-
The printer driver must be installed on the client computer.
Installing the Printer Driver for the Network Printer