Machine Status Notification by E-mail
You can specify two ways of e-mail notification by Web Image Monitor.
Auto Email Notification
When paper is run out or paper misfeed occurs, e-mail is sent to the preregistered e-mail address. You can divide the registered e-mail addresses into four groups and can specify different notification for each group.
On-demand Email Notification
When you enter "requeststatus" in the title of e-mail and send it to the [Email Notification E-mail Address] of the machine, the machine status and settings are given as a reply. When the machine receives e-mail of the registered mail address, you can receive a replay.

-
Depending on your e-mail application, a phishing warning might appear after you receive an e-mail message. To prevent phishing warnings appearing after you receive e-mail from a specified sender, you must add the sender to your e-mail application's exclusion list.
When you specify Email Notification, the e-mail shown below is sent.
|
Subject: Device Alert Notification: Replace Print Cartridge. (Black) |
|
Add toner (Black) Printer: Out of Toner Details: Out of Toner: Black ---------------------------------------------------------------------- Model Name: (Product Name) Name: (Machine Name) Comment: TCP/IP (Ethernet) Host Name: Host Name Domain Name: IPv4 Address: (IP address of the machine) Physical Address Ethernet: (MAC Address) SMB Work Group Name: WORKGROUP Computer Name: (Computer Name) Share Name: (Share Name) ---------------------------------------------------------------------- Device Page URL (Ethernet): http://(IP address of the machine) Groups to Notify: (Group Name) |
You can specify the sender's mail address of the email-notification and destination mail address of the on-demand email notification.
Specify an e-mail address to which the machine can send e-mail in advance.
Configuring the Settings to Send E-mails from the Machine
- You cannot use the user name and email address used in [Fax Email Account].
-
Log in to Web Image Monitor as a machine administrator.
When custom-privileges administrators are registered, you can log in to the machine as a custom-privileges administrator with the Send (Email/Folder) privilege as well. -
Click [Configuration] on the "Device Management" menu.
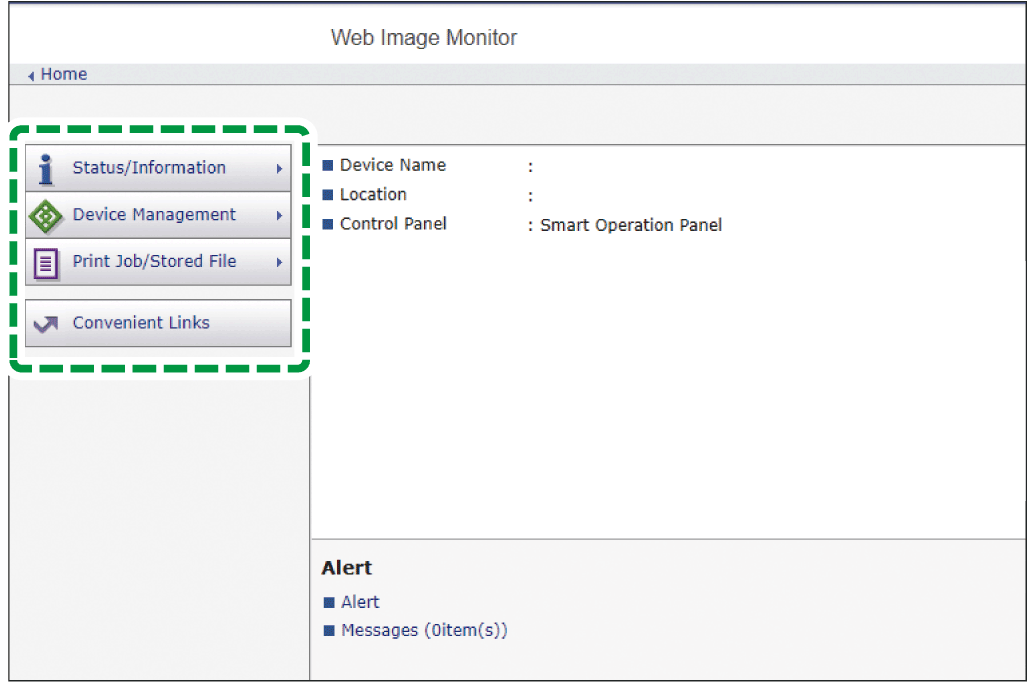
-
Click [Email] under the "Device Settings" category.
-
Specify the mail address and password of the account used for mail notification under "Email Notification Account".
When you use the On-demand Email Notification function, select [On] check box under "Receive Email Notification". -
When setting is complete, click [OK].
Then specify the settings for Auto Email Notification and On-demand Email Notification.
-
Log in to Web Image Monitor as a machine administrator.
-
Click [Configuration] on the "Device Management" menu.
When custom-privileges administrators are registered, you can log in to the machine as a custom-privileges administrator with the [Send] privilege as well. -
Click [Auto Email Notification] under the "Device Settings" category.
-
To add a text to the message of all notify destination e-mails, enter the text in "Notification Message".
You can enter any text, such as the machine's location, service representative contact information. -
Click [Edit] in Group 1 to 4 under "Groups to Notify", and specify Subject, Message, and Notify Address of the e-mail.
-
Select the items and groups of the notification mail in "Select Groups/Items to Notify".
-
Click [Edit] under "Detailed Settings of Each Item" and specify the timing to send the notification mail, as necessary.
-
When setting is complete, click [OK] twice.
-
Click [Logout] to quit Web Image Monitor.
-
Log in to Web Image Monitor as a machine administrator.
When custom-privileges administrators are registered, you can log in to the machine as a custom-privileges administrator with the [Send] privilege as well. -
Click [Configuration] on the "Device Management" menu.
-
Click [On-demand Email Notification] under the "Device Settings" category.
-
To add a text to the subject and message of all notify destination e-mails, enter the text in "Notification Subject" and "Notification Message".
-
Text entered in Notification Subject is displayed at the top of the Subject.
-
In Notification Message, you can enter any text, such as the machine's location, service representative contact information.
-
-
Specify the Email Addresses and Domain Names to reply Access Restriction to Information or On-demand Email Notification.
For details about the settings and how to enter the information, see Web Image Monitor Help. -
When setting is complete, click [OK].
-
Click [Logout] to quit Web Image Monitor.
Specifying an address that is authenticated by OAuth 2.0 authentication for on-demand e-mail notification
-
Log in to Web Image Monitor as a machine administrator.
When custom-privileges administrators are registered, you can log in to the machine as a custom-privileges administrator with the [Send] privilege as well. -
Click [Configuration] on the "Device Management" menu.
-
Click [Email] under the "Device Settings" category.
-
Select On for [Use OAuth 2.0 Authentication] in "[Exchange Online] OAuth 2.0 Authentication", and then specify the settings as necessary.
-
[Exchange Online] OAuth 2.0 Authentication
-
-
[POP3/IMAP4 Server Name]: outlook.office365.com
-
-
[Exchange Online] Reception
Specify [Reception Protocol], [Email Reception Interval], [Max. Reception Email Size], and [Email Storage in Server] according to the environment you are using.
-
[Exchange Online] OAuth 2.0 Email Notification Account
-
[Receive Email Notification]: On
-
Specify [Email Notification E-mail Address] and [Email Notification User Name] according to the environment you are using.
-
-
-
Click the [Start Authentication] button in "[Exchange Online] OAuth 2.0 Email Notification Account".
-
Make a note of the user code that is displayed on the [OAuth 2.0 Authentication] screen.
-
Click the authentication URL from Microsoft that is displayed on the [OAuth 2.0 Authentication] screen.
-
Enter the user code in the Microsoft authentication screen to complete the authentication.
-
Click [OK] on the [OAuth 2.0 Authentication] screen.
-
Make sure that the OAuth2.0 authentication is complete in "[Exchange Online] OAuth 2.0 Email Notification Account", and then click [OK].
-
Click [Logout] to quit Web Image Monitor.