Specifying the Action to Perform When Receiving a Fax from Different Senders
You can specify the action the machine performs when receiving faxes per registered sender (Special Sender).
Overview of [Register Special Sender]
Using the settings in [Register Special Sender], you can specify the behavior of the machine according to the sender. The reception method specified in the setting other than [Register Special Sender] is applied when receiving a fax from any other sender.
Example of Forwarding
You can specify Forwarding in [Reception File Settings] and [Register Special Sender]. To perform Forwarding on faxes received from Special Senders, configure the settings as follows:
[Fax Settings]
 [Reception Settings]
 [Reception File Settings]
 [Action on Receiving File]
 [Forwarding]: [Off]
[Fax Settings]
 [Reception Settings]
 [Register Special Sender]
 [Register/Change/Delete]
 [Forwarding per Sender]: [On]
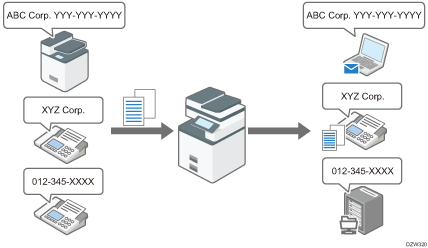
The reception function that can be specified per special sender
Item | Description |
|---|---|
Authorized Reception per Sender | Specify whether to limit the senders to accept transmission. You can configure the machine to accept transmissions from Special Senders only or from senders other than Special Senders. |
Reception File Print Quantity per Sender | Specify the number of copies of received documents to print per Special Sender. |
Forwarding per Sender | Specify the forwarding destination of documents per Special Sender. |
2 Sided Print per Sender | Specify whether to print received faxes on both sides of the output paper per Special Sender. |
Memory Lock Reception per Sender | Specify whether to apply Memory Lock Reception to received documents per Special Sender. Printing a fax received by Memory Lock Reception requires entering the Memory Lock ID. Register the Memory Lock ID in advance. |
Paper Tray per Sender | Specify the paper tray to print the received document per Special Sender. You can also specify the bypass tray. |
Remote Reception Setting per Sender | Specify whether to transfer received faxes to the registered sub-machine per Special Sender. |
Special sender list
You can print the list of Special Senders that are registered. This list is useful when checking the setting of each special sender. To print the list, press [Fax Settings] [Reception Settings]
 [Register Special Sender]
 [Register Special Sender: Print List].

You cannot use the following functions when receiving Internet Faxes:
Authorized Reception per Sender
Reception File Print Quantity per Sender
Memory Lock Reception per Sender
You cannot use the functions related to Special Sender when receiving an e-mail with a JPEG/PDF file attached.
When you delete a destination that is specified as the forwarding destination of the Forwarding per Sender function, "Unprogrammed" is printed in the "Forwarding Destination" column on the special sender list.
The machine cannot differentiate between SEP Code Reception documents from special senders.
Specifying the Functions to Use the Settings for a Special Sender
 Press [Settings] on the Home screen.
 Press [Fax Settings] on the Settings screen.
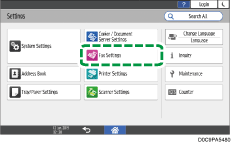
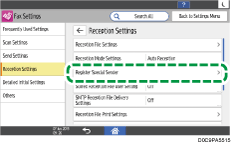
 Press [Reception Settings]
 [Register Special Sender] to display the screen for programming Special Senders.
 Specify the functions to apply the settings of Register Special Sender.
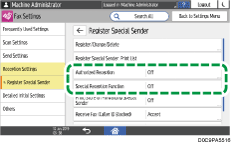
Authorized Reception
Specify whether to use Authorized Reception. When specifying [On], select whether to not receive faxes from the sender specified in the Authorized Reception per Sender function, or receive only faxes sent from the sender specified in the Authorized Reception per Sender function.
Special Reception Function
Specify whether to use the following functions:
Authorized Reception per Sender
2 Sided Print per Sender
Reception File Print Quantity per Sender
Memory Lock Reception per Sender
Forwarding per Sender
Paper Tray per Sender
Remote Reception Setting per Sender
Configure the functions individually on the [Register/Change] screen for those functions for which [On] is specified.
The setting for each item in the [Reception Settings] is applied to the functions that are set to [Off].
 Press [OK].
 Press [Home] (
 ) after specifying the settings.
Specifying the Reception Functions for Each Special Sender
After confirming and taking note of the sender name and fax number, register the name and fax number of a Special Sender, and specify the reception functions to configure for each Special Sender.

For details about the procedure for configuring the Authorized Reception function, see the following section:
 Press [Fax] on the Home screen.
 Press [Job Status] on the fax screen.
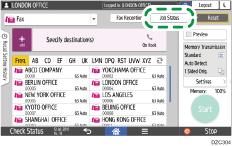
 Press [Reception Result] to browse the sender information on the operation panel, or press Records to check the information in the reception report.
Browsing the sender information on the operation panel
Press [Reception Result] and select [Display All] or [Display Specified Period].
Check the "Sender" field.
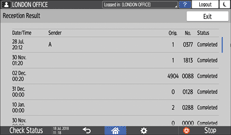
Take a note of the sender name, paying attention to the capitalization of the alphabetic characters used for the name.
Viewing the Report for the Sender Information
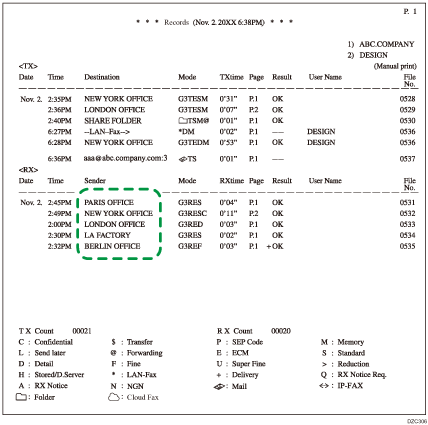
Press [Print Records], and then select the transmission result to print.
Check the "Sender" column under
. 
 After checking the information, press [Settings] on the Home screen.
 Press [Fax Settings] on the Settings screen.

 Press [Reception Settings]
 [Register Special Sender]
 [Register/Change/Delete] to display the screen for programming Special Senders.
 Press [Register].
 Specify the name (Fax Header) or fax number of the sender to register.
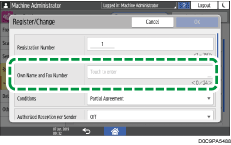
Be sure to enter the information correctly on the note you have taken in Step 3.
 Specify the condition to match the string.
Full Agreement: The machine applies the reception function settings of the Special Sender when the information received from the sender matches with the registered information completely.
Partial Agreement: The machine applies the reception function settings of the Special Sender when the information received from the sender matches with the registered information even partially.
 Press the reception function to apply to the Special Sender that is registered and then configure the settings for the function.
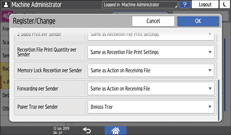
[Forwarding per Sender] becomes invalid when you specify the Special Sender in [Forwarding per Sender] that is the same as that specified in [Memory Lock Reception per Sender].
When you select [Same as Action on Receiving File], the setting for each item in [Fax Settings]
 [Reception Settings] is applied.
You can enable [Memory Lock Reception per Sender] only when [Register Memory Lock ID] is specified in [Fax Settings]
 [Detailed Initial Settings].
 Press [OK].
 When specifying [Bypass Tray] in [Paper Tray per Sender] for the reception function, specify the size of paper to load on the tray.
Press [Register Special Sender].
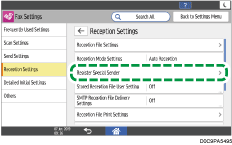
Press [Bypass Tray Paper Size], and then press [Regular Size] or [Custom Size].
When specifying [Print 2 Sided per Sender], do not specify [Custom Size] in [Bypass Tray Paper Size].
Specify the size.
 Press [OK].
 Press [Home] (
 ) after specifying the settings.
