Specifying Access Privileges for Documents Stored in Document Server
You can specify access privileges (authority to read or edit a document) for documents stored in the document server so as to prevent unauthorized use. Only the user who has access privileges can perform operations on the document within his/her privileges.
The user who stored the document or the document administrator can specify the access privileges. Access privileges can be granted to the users registered in the address book.
In advance, specify user authentication in the machine. To protect a document when user authentication is not specified, specify a password on the document when storing.
Viewing and Editing the Information of Documents in Document Server

Access permission to stored print documents sent from the printer driver and stored on the machine can only be specified in Web Image Monitor.
Specifying Access Privileges for Documents Stored in the Machine
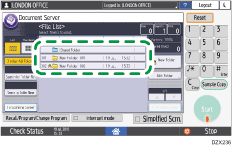
 On the Home screen, press [Document Server].

 On the document server screen, select the desired folder.

 Select the document to specify the access privileges, and then press [Change File Info.].
 Press [Change Access Priv.].
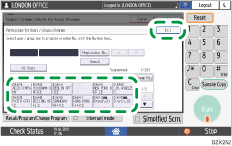
 Press [Program/Change/Delete] of [Permissions for Users/Groups].
 Press [New Program].
 Select the user to receive access privileges, and then press [Exit].

 Press [Program/Change] to select the user, and then specify the access privileges.
The contents of the access privileges are as follows:
Read-only: Authorized to read and print the document.
Edit: The privileges of [Read-only], and authorized to change the printer settings.
Edit / Delete: The privileges of [Edit], and authorized to delete the document.
Full Control: The privileges of [Edit / Delete], and authorized to specify the access privileges.
 Press [Exit]
 [OK]
[OK] [OK].
[OK].

To cancel the Access Privileges, press [Delete] after performing Step 5 to select the user, and then press [Yes].
