Sending Faxes from a Computer
You can send a document created on a computer directly by fax without printing it out by going through the machine.

Install the LAN-Fax driver on the computer in advance.

To specify a destination from the address book registered in the machine, save the address book on your computer and import the destinations registered in the address book to the Destination List of LAN-Fax in advance.
For the procedure to import the destinations, see Using the Address Book of the Machine as Address Book of LAN Fax.
It is recommended that you use Web Image Monitor running under the same network environment as this machine. Otherwise, the web browser may not open and an error may occur.
Basic Procedure for Sending Documents by LAN-Fax
"Print" a document from the application on the computer to a printer via LAN-Fax to send the document directly by Fax.
 Open the document to send on the computer, and display the configuration screen of LAN-Fax from the print menu in the application.
The procedure varies depending on the application.
Example of Microsoft Word:
Select [Print] from the menu, select "LAN-Fax Generic" in "Printer", and then click [Print].
 Select [Address Book] from the menu on the left, and specify the destination.
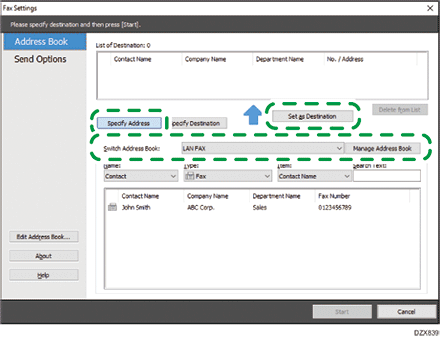
To use the Address Book, click [Specify Address], and then specify the Address Book to use in "Switch Address Book:". Also, specify the destination name and type. Select a destination in the list, and click [Set as Destination].
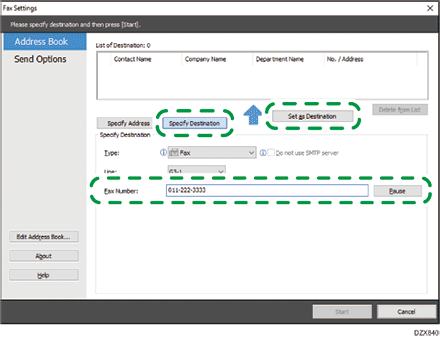
To enter the destination manually, select [Specify Destination] and specify the destination type and line. Enter the destination, and click [Set as Destination].
 Click [Start].
The document data is sent to the machine, and the machine transmits the data to the destination.

You can also store a document in the Document Server of the machine instead of sending it to the destination immediately. To store a document in the Document Server, specify the setting for storing the document before sending it from a computer.
Click [Send Options] on the "Fax Settings" screen.
Select the [Send to Document Server] check box.
Click [Document Server Details], enter the user name and document name, and then click [OK].
Click [Start].
When the function to prevent transmission to the wrong destination is specified on the machine, you will be prompted to re-enter or confirm the destination fax number.
The machine can retain documents sent from a LAN-Fax Driver as files to be sent.
For the maximum values of the following items, see List of Maximum Values for Each Setting Item:
Number of destinations that can be specified for a document when distributing by Broadcast Transmission
Number of transmission files sent from the LANFax driver that can be stored as Transmission Standby Files on the machine
Number of characters/digits in a destination that can be entered manually
Using the Address Book of the Machine as Address Book of LAN Fax
You can import the address book of the machine into Address Book of LAN-Fax, and specify a destination in the function.

To import the address book of the machine into Address Book of LAN-Fax, specify the IPv4 address of the machine in the settings of [Port] in [Printer Properties] in advance.
 Open the document to send on the computer, and display the configuration screen of LAN-Fax from the print menu in the application.
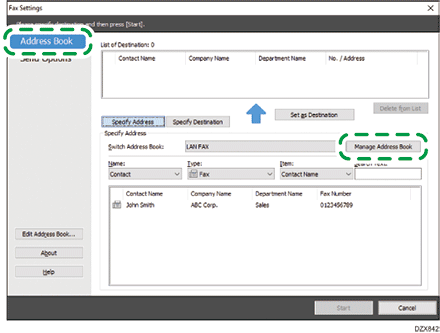
 Click [Address Book] in the menu on the left, and click [Manage Address Book].
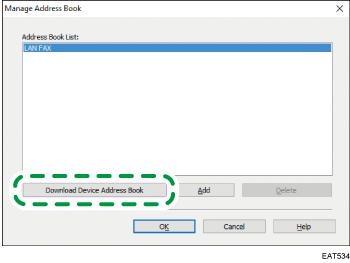
 Click [Download Device Address Book].
 Enter the user information of the user administrator of the device or address book, and then click [Import...].
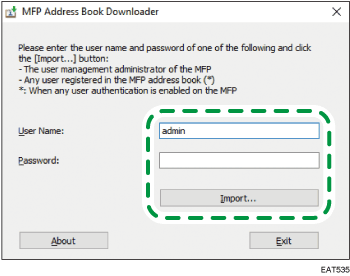
 Confirm that the address book of the machine has been imported correctly, and click [OK].
 Click [Specify Address], and select the address book of the machine in "Switch Address Book:".
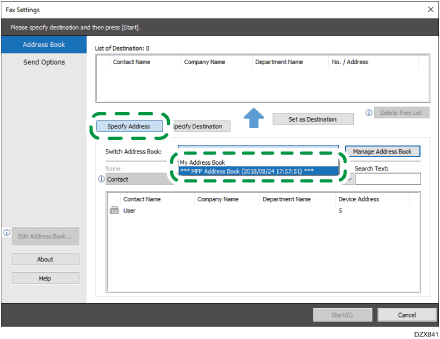
 Select a destination from the list, and click [Set as Destination].
 Click [Start].

When importing the destinations that are registered as a group into "Address Book", which destination to send per person is determined in the following priority order: IP-Fax destination, fax number and e-mail address. Check the destination when importing, and change the setting if necessary.
Creating a cover sheet to attach to documents being sent by LAN Fax
You can create a cover sheet to attach to documents being sent by LAN-Fax by using [LAN-Fax Cover Sheet Editor] included in the LAN-Fax driver.
By using [LAN-Fax Cover Sheet Editor], you can create cover sheets with various layouts by inserting the necessary text information as well as by drawing figures.
You can also edit and use the samples included in [LAN-Fax Cover Sheet Editor].
For the procedure to create a cover sheet, see the following:
 On the [Start] menu, click [All apps]
  [LAN-Fax Generic Utilities]
 [LAN-Fax Cover Sheet Editor].
 Create a cover sheet by using the tools on the [Draw] menu.
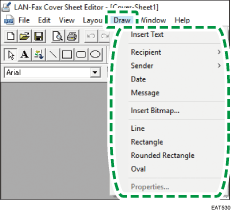
Tools | Description |
|---|---|
Insert Text | Type in text. |
Recipient | Enter relevant information on [Company Name], [Department Name], and [Contact Name]. |
Sender | Enter relevant information on [Company Name], [Department Name], [Contact Name], [Telephone Number], and [Fax Number]. |
Date | Insert the date. |
Message | Insert messages that were registered in the LAN-Fax driver. |
Using a sample to create a cover sheet
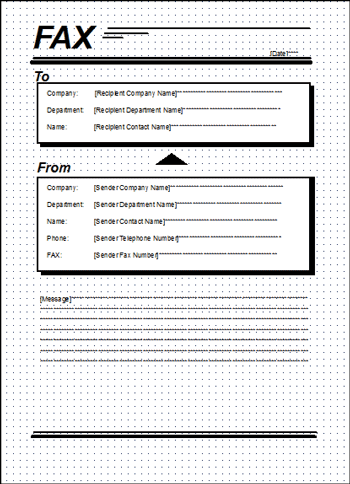
To use a sample to create a cover sheet, click [File] [Open] and select a sample to use.
Example of sample 1:
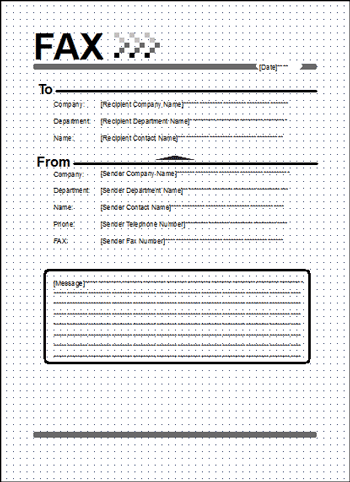
Example of sample 2:
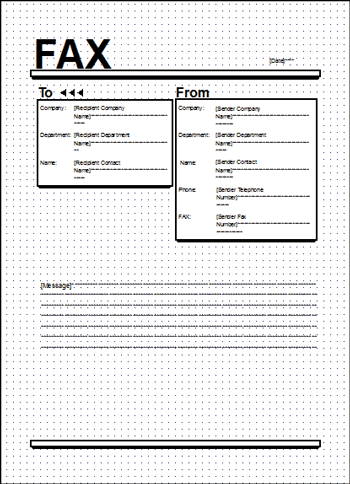
Example of sample 3:
 Click [File]
 [Save as...].
 Specify [Save in] and [File name], and then click [Save].
[Desktop] is specified in [Save in] and [test] is specified as [File name], for example.
