This section explains how to replace the cleaning unit for the fusing unit. When you replace the fusing unit, it is necessary to attach the cleaning unit for the fusing unit to the new fusing unit.
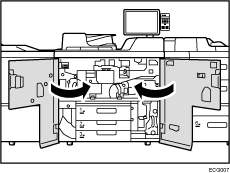
![]() Open the front covers.
Open the front covers.

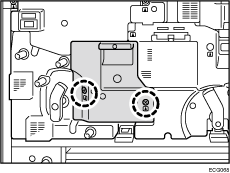
![]() Remove the 2 screws.
Remove the 2 screws.
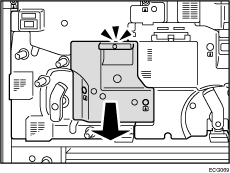
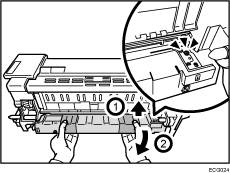
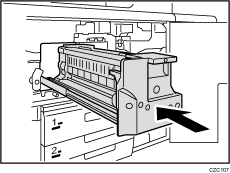
![]() Pull out the fusing unit.
Pull out the fusing unit.
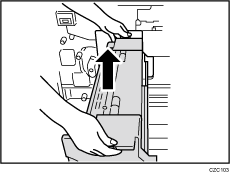
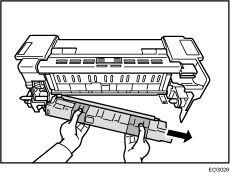
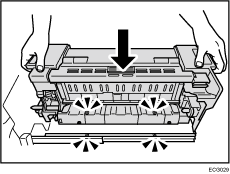
![]() Remove the fusing unit.
Remove the fusing unit.
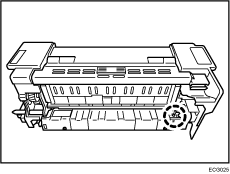
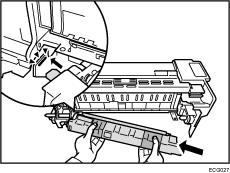
![]() Remove the screw.
Remove the screw.
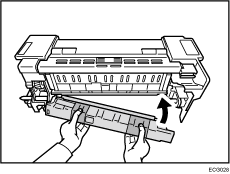
![]() Slightly lift up the right side of the fusing cleaning unit to unlock the unit, and then pull the right side of the unit out toward you.
Slightly lift up the right side of the fusing cleaning unit to unlock the unit, and then pull the right side of the unit out toward you.
![]() Remove the cleaning unit for the fusing unit.
Remove the cleaning unit for the fusing unit.
![]() Align the projection of the new cleaning unit with the appropriate hole in the fusing unit.
Align the projection of the new cleaning unit with the appropriate hole in the fusing unit.
When you replace the fusing unit, it is necessary to attach the cleaning unit for the fusing unit to the new fusing unit.
![]() Push the right side of the cleaning unit inward until it locks into position.
Push the right side of the cleaning unit inward until it locks into position.
![]() Secure the cleaning unit for the fusing unit with the screw.
Secure the cleaning unit for the fusing unit with the screw.
![]() Mount the fusing unit on the guide.
Mount the fusing unit on the guide.
![]() Push the new fusing unit back into the machine.
Push the new fusing unit back into the machine.
![]() Secure the fusing unit with the 2 screws.
Secure the fusing unit with the 2 screws.

![]() Close the front covers.
Close the front covers.
![]() Reset the counter for replaceable parts.
Reset the counter for replaceable parts.
Do not turn the machine on until you have read how to do so.