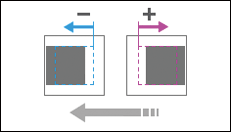
Adjust the image position printed on the paper by adjusting the start timing of the registration.

You cannot individually adjust the image position on sides 1 and 2.
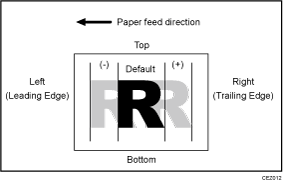
Side 1

Press [![]() ] to shift the image to the right (trailing edge).
] to shift the image to the right (trailing edge).
Press [![]() ] to shift the image the left (leading edge).
] to shift the image the left (leading edge).
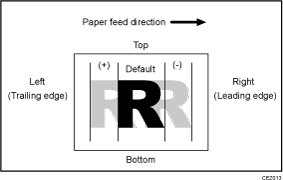
Side 2

Press [![]() ] to shift the image to the left (trailing edge).
] to shift the image to the left (trailing edge).
Press [![]() ] to shift the image to the right (leading edge).
] to shift the image to the right (leading edge).
Setting Items |
Default Value |
Max. Value |
Min. Value |
Step |
Unit |
|---|---|---|---|---|---|
[Paper Weight 0] |
0.0 |
3.0 |
-3.0 |
0.1 |
mm |
[Paper Weight 1] |
|||||
[Paper Weight 2] |
|||||
[Paper Weight 3] |
|||||
[Paper Weight 4] |
|||||
[Paper Weight 5] |
|||||
[Paper Weight 6] |
|||||
[Paper Weight 7] |
|||||
[Paper Weight 8] |
![]()
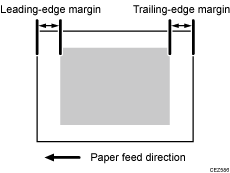
If the leading-edge margin on Side 1 of the paper is too narrow, paper jams may occur.
If the trailing-edge margin on Side 1 of the paper is too narrow, paper jams may occur when printing on the back side of paper during duplex printing.

This setting is not effective for paper fed from paper trays with custom paper presets. For such paper, the value specified in [With Feed] in [Image Position: Side 1] / [Image Position: Side 2] in 1101 [Image Position] in "Advanced Settings" takes precedence.
