How to Replace the Drum Unit
![]()
Place the drum unit on a flat surface. Do not stand the drum unit on end or lean it against an object.
When carrying the combined unit, do not touch the lock lever. The lock may be released, causing the drum unit to fall off.
When you replace the drum unit, replace it immediately since the performance may be reduced if the drum unit is exposed by a light for a long period.
Close all paper trays and optional paper feed units before opening the front cover.
![]() Open the box and remove the cardboard.
Open the box and remove the cardboard.
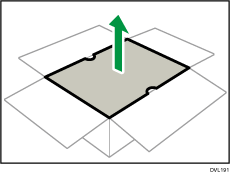
![]() Hold the packaging on the left and right to take out the new drum unit.
Hold the packaging on the left and right to take out the new drum unit.
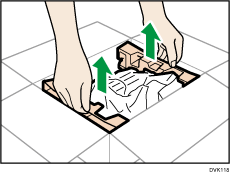
![]() Remove the packaging.
Remove the packaging.
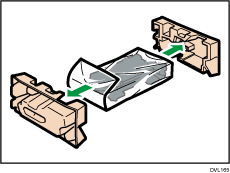
![]() Take the drum unit out from the bag.
Take the drum unit out from the bag.
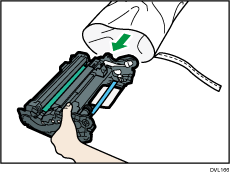
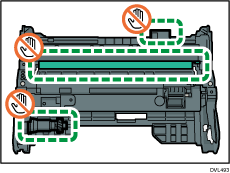
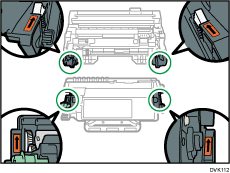
Do not touch the parts illustrated below.
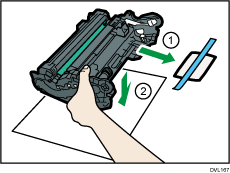
![]() Remove the desiccant from the drum unit and put the drum unit on a level surface.
Remove the desiccant from the drum unit and put the drum unit on a level surface.
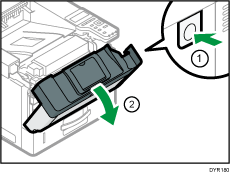
![]() Press the front cover open button on the right side of the machine to open the front cover.
Press the front cover open button on the right side of the machine to open the front cover.
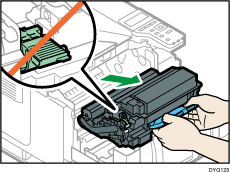
![]() Hold the handle of the combined unit with both hands, and then pull it out.
Hold the handle of the combined unit with both hands, and then pull it out.
Do not touch the lock lever when pulling out the combined unit.
Spread a piece of paper on a level surface and then place the combined unit on top of it.
![]() Clean the registration roller and the parts around the transfer roller.
Clean the registration roller and the parts around the transfer roller.
See Cleaning Around the Transfer Roller and Cleaning the Registration Roller for the procedure for cleaning.
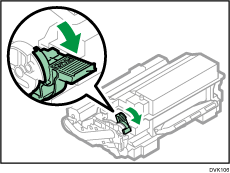
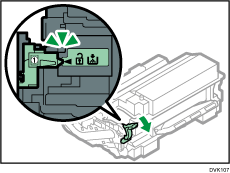
![]() Pull the lock lever forward to release the lock in two steps.
Pull the lock lever forward to release the lock in two steps.
Pull down the lock lever until it is level and align it with the triangle mark.
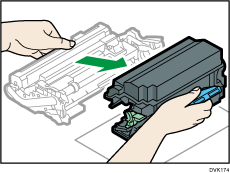
![]() Hold the drum unit by hand and hold the handle of the print cartridge to pull it forward to detach it from the drum unit.
Hold the drum unit by hand and hold the handle of the print cartridge to pull it forward to detach it from the drum unit.
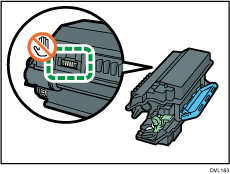
Do not touch the part illustrated below.
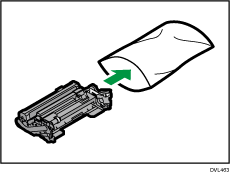
![]() Put the used drum unit in the bag which the new drum unit was in.
Put the used drum unit in the bag which the new drum unit was in.
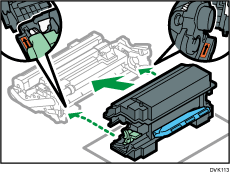
![]() Hold the handle of the print cartridge with both hands, and then use the arrow marks on the left and right sides as a guide to connect it to the new drum unit.
Hold the handle of the print cartridge with both hands, and then use the arrow marks on the left and right sides as a guide to connect it to the new drum unit.
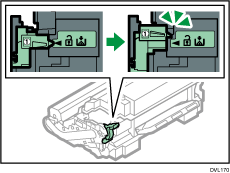
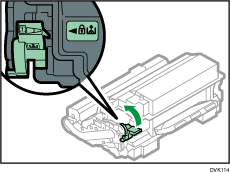
![]() Push the lock lever to the back to lock it.
Push the lock lever to the back to lock it.
![]() Hold the handle of the combined unit with both hands, and then insert it along the rails.
Hold the handle of the combined unit with both hands, and then insert it along the rails.
At first, lift the handle and place the combined unit slightly into the opening of the machine. When the combined unit fits in the rails, insert it into the machine.
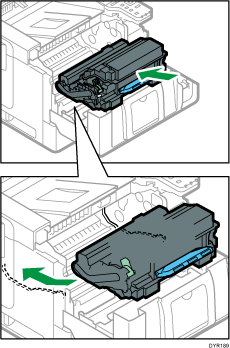
Insert the combined unit until it stops.
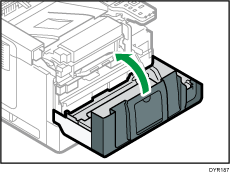
![]() Close the front cover.
Close the front cover.
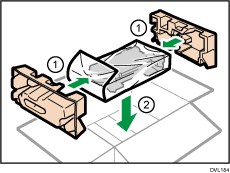
![]() Attach the packaging to the used drum unit over the bag and put it in the box.
Attach the packaging to the used drum unit over the bag and put it in the box.
When discarding used drum unit, see Disposing of Used Drum Unit.
